Are you a restaurant owner? Are you looking for a WordPress restaurant ordering system or just an easy and simple way to let people order online from your restaurant?
Your website can easily start making your business make more money by allowing customers to order takeout or delivery online. So in this post, we have put together a beginner-friendly step-by-step tutorial on how to create an online restaurant order form with WordPress.
Here’s a quick breakdown of this tutorial to help you navigate each step:
- Generate a take away order form
- Customize your restaurant’s online order form
- Configure your form settings
- Configure your form notifications
- Customize your form confirmations
- Configure payment settings
- Add your restaurant’s online order form to your site
Why is it better to order online?
There are many reasons why you might consider adding online ordering to your restaurant’s website. Here are some:
- To maintain an income in your business if you are forced to close for dinner
- You’ll get even more accurate orders when customers place their own orders online
- You can expand the reach of your business by allowing more customers to discover your restaurant and try your food without dining at
- You’ll build an email list and be able to digitally market to your customers with coupons or online contests.
- Employee productivity could increase with less time taking phone orders
It’s pretty obvious that offering online ordering for your restaurant is a good idea, so let’s not waste any more time and see how to turn your website into a WordPress restaurant ordering system.
How to create an online restaurant order form with WordPress
If you want to turn your site into a WordPress restaurant ordering system, it’s actually pretty easy. You can do this by simply creating an online restaurant order form with WordPress.
Here are the steps to build your restaurant’s online order form:
Step 1: generate a take away order form
The first thing you will need to do is install and activate the WPForms plugin.
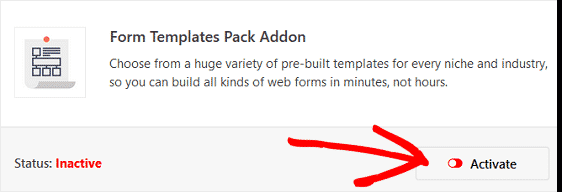
Next, you will need to install and activate the Form Template Pack plugin. With this plugin, you will be able to access the pre-built food order form template, as well as tons of other industry specific templates to create custom forms for your site.
This saves you a lot of time as you won’t have to start from scratch and manually add fields to a basic contact form.
From the WPForms plugins page, find the form template package.
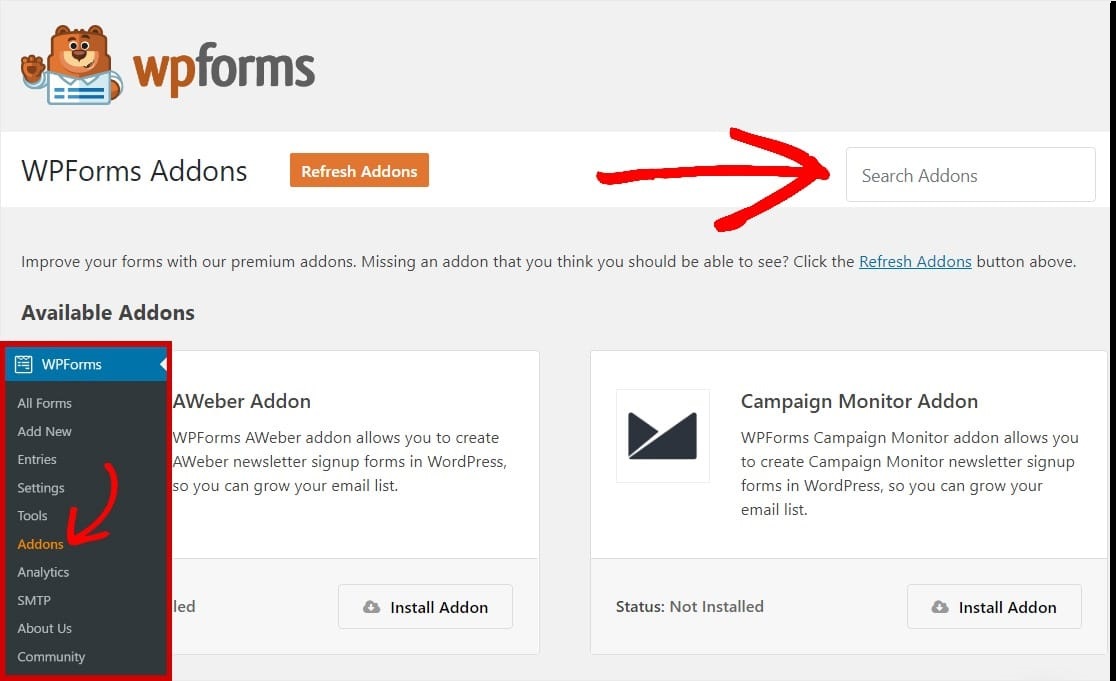
Click Install Plugin and Activate.
Then go to WPForms »» Add New to create a new form.
On the setup screen, give your form a name and scroll to the bottom of the templates screen where it says Additional Templates.
Type “Takeout” in the search bar and the take order form template will appear.
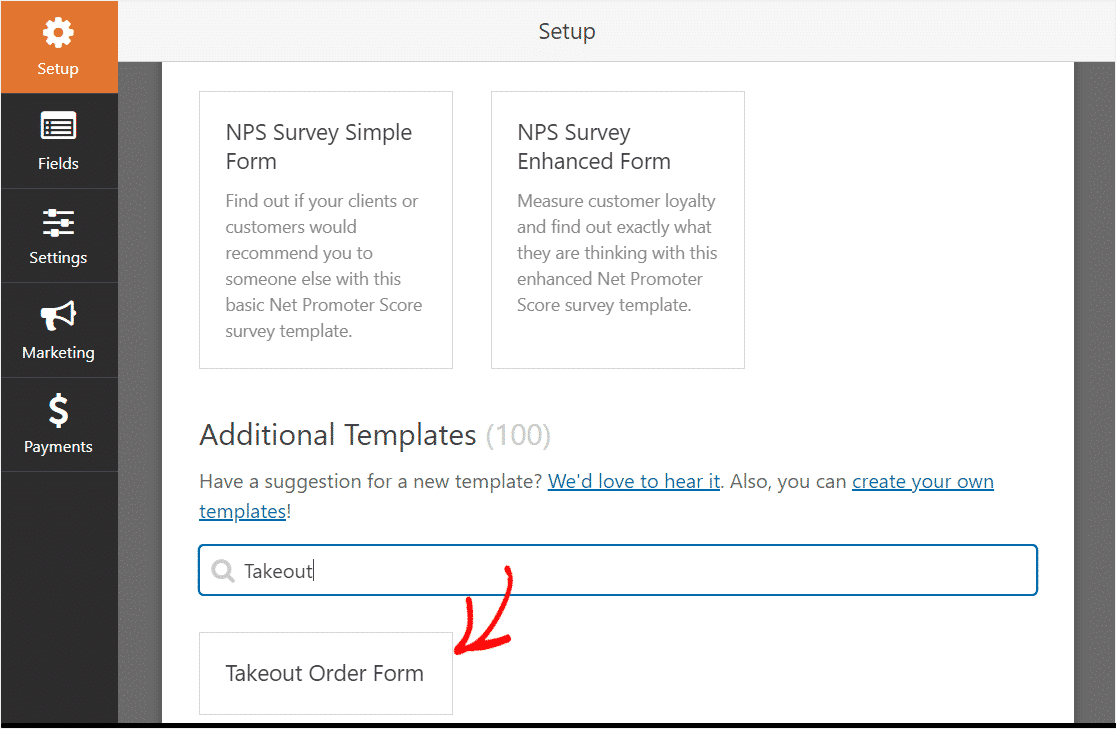
Click on the template and WPForms will automatically create a takeout order form template.
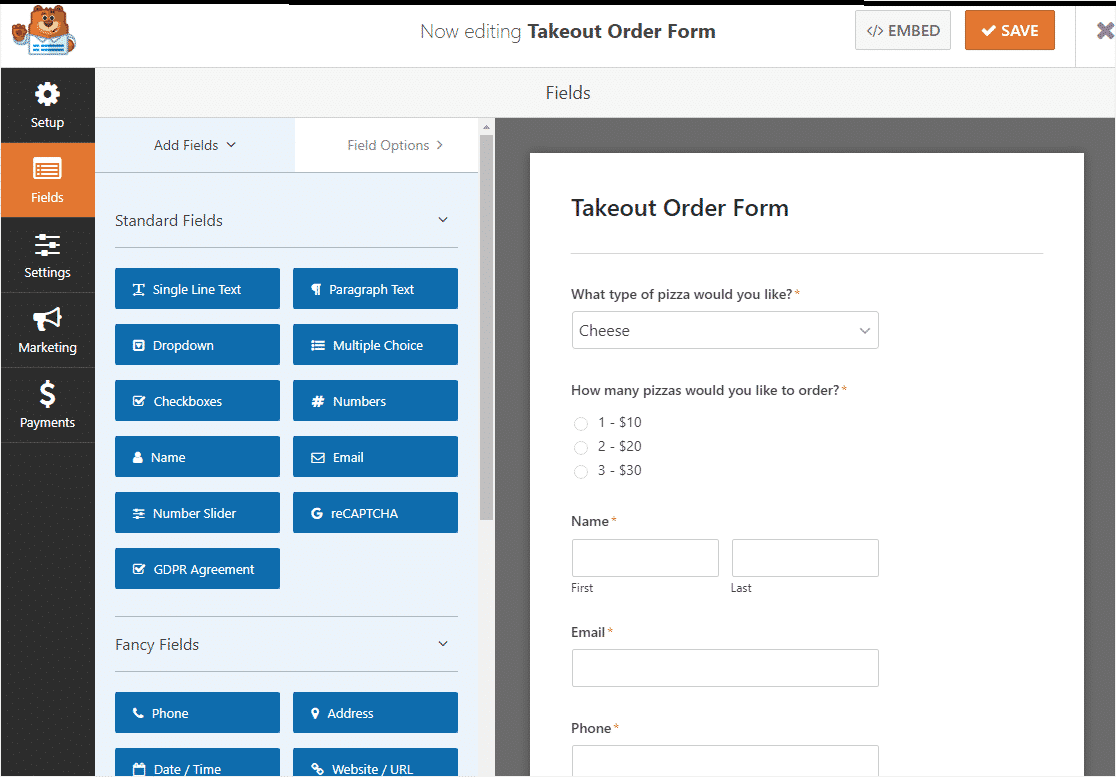
Pretty impressive, right? Let’s go ahead and customize this form.
Step 2: Customize your form
WPForms makes it easy to customize forms.
This form comes with the following fields in this order:
- Drop down
- Multiple choice
- Name (first and last)
- Telephone
- Speak to
Unless you’re a pizzeria, you probably need to customize your template a bit to match your particular menu.
It is easy to do this. First, go ahead and delete the first 2 fields by clicking the red arrow in the upper right corner of each field.
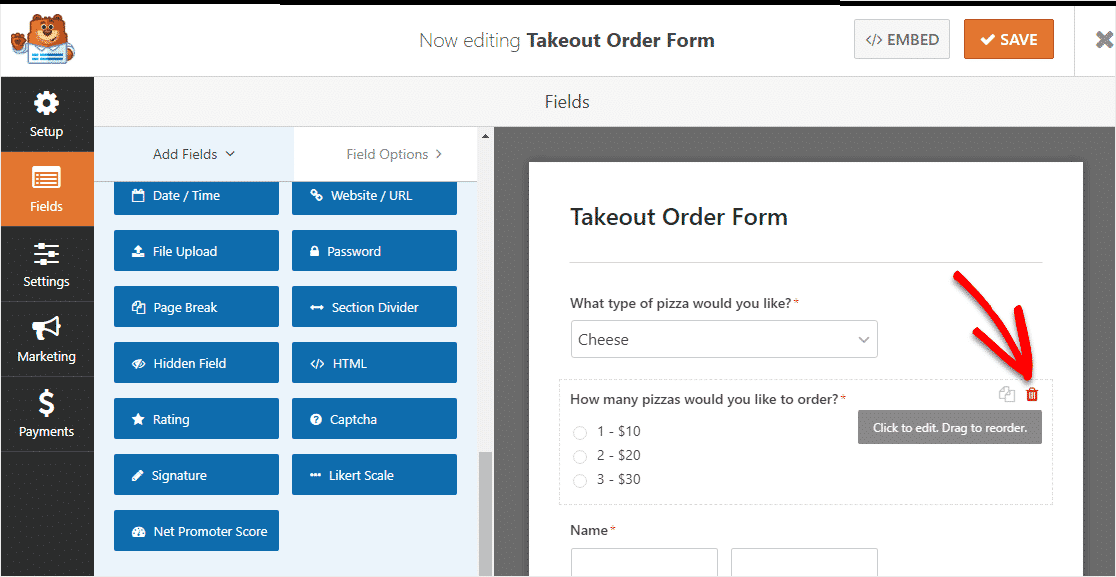
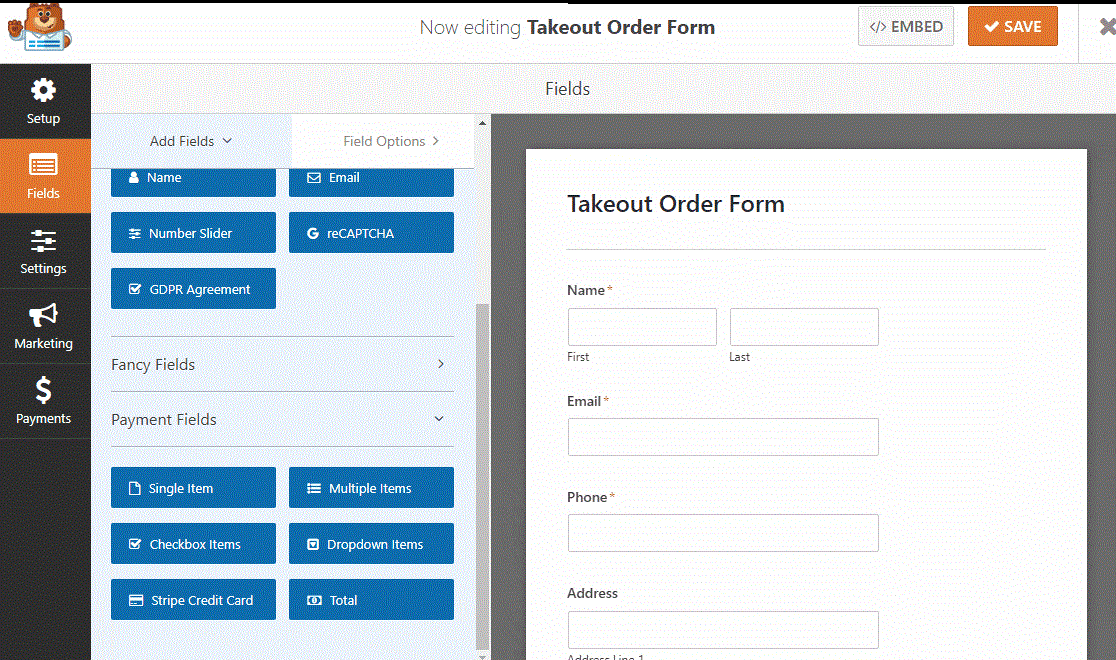
Once those first 2 fields are gone, head over to the left panel and scroll to the bottom under Payment Fields. Find the Multiple Items field and drag it onto your form.
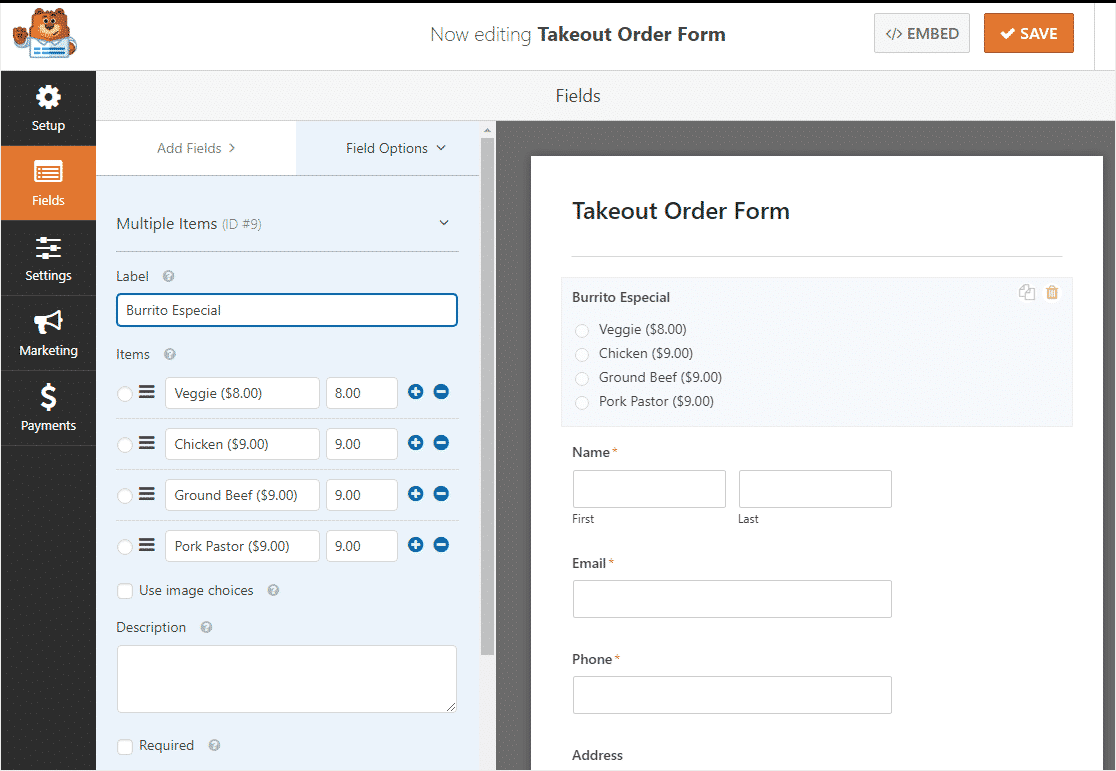
Once you’ve added the Multiple Items field, click on the field and go to the left pane to edit the name and price of each item.
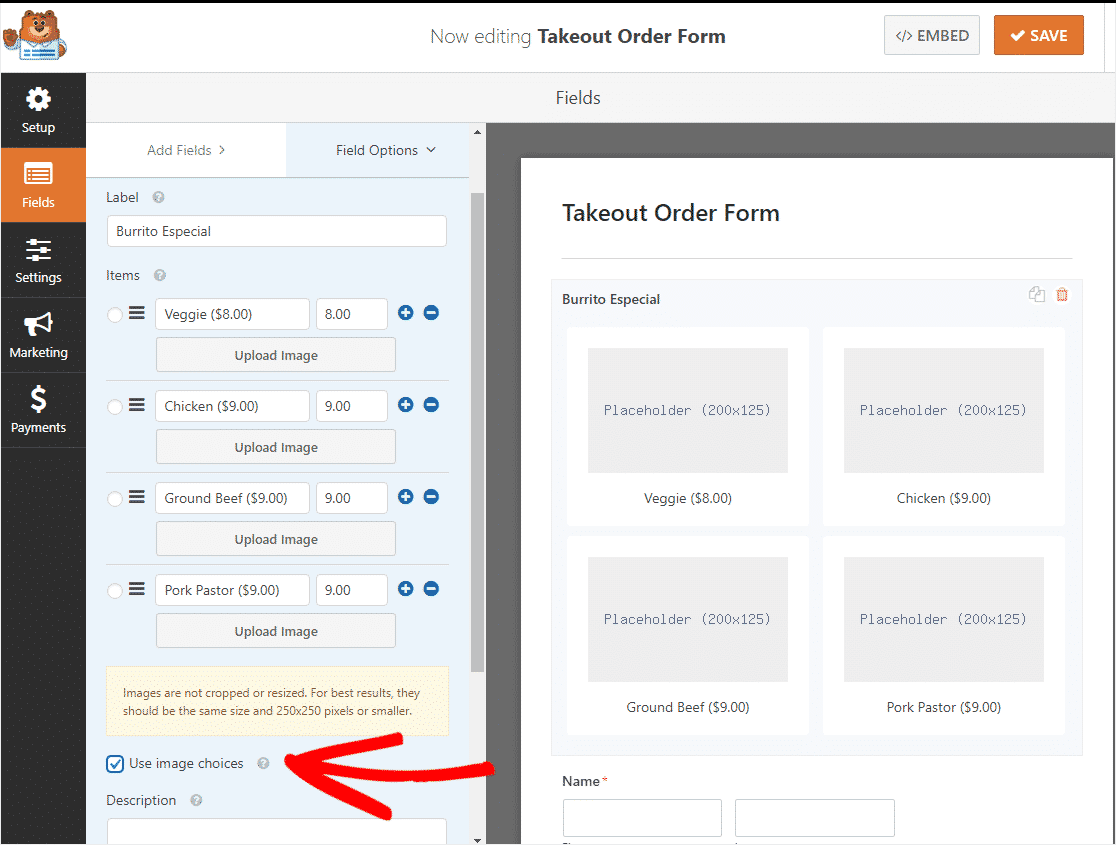
We suggest that you use each Multiple Item field to list a different menu item below the label, and then list the different options and prices under Items. Here is an example:
One of the best things you can do is add image options to your restaurant menu online. Just click the Use image options box to add them.
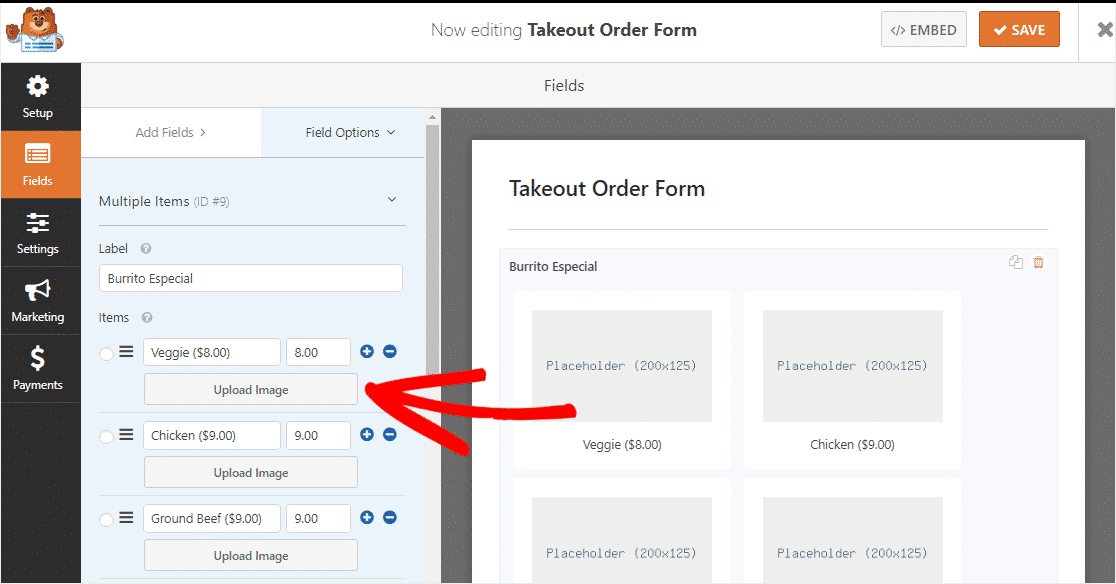
Now, click the Upload Image button under each item to choose an image for each menu item.
Now repeat this for each different item.
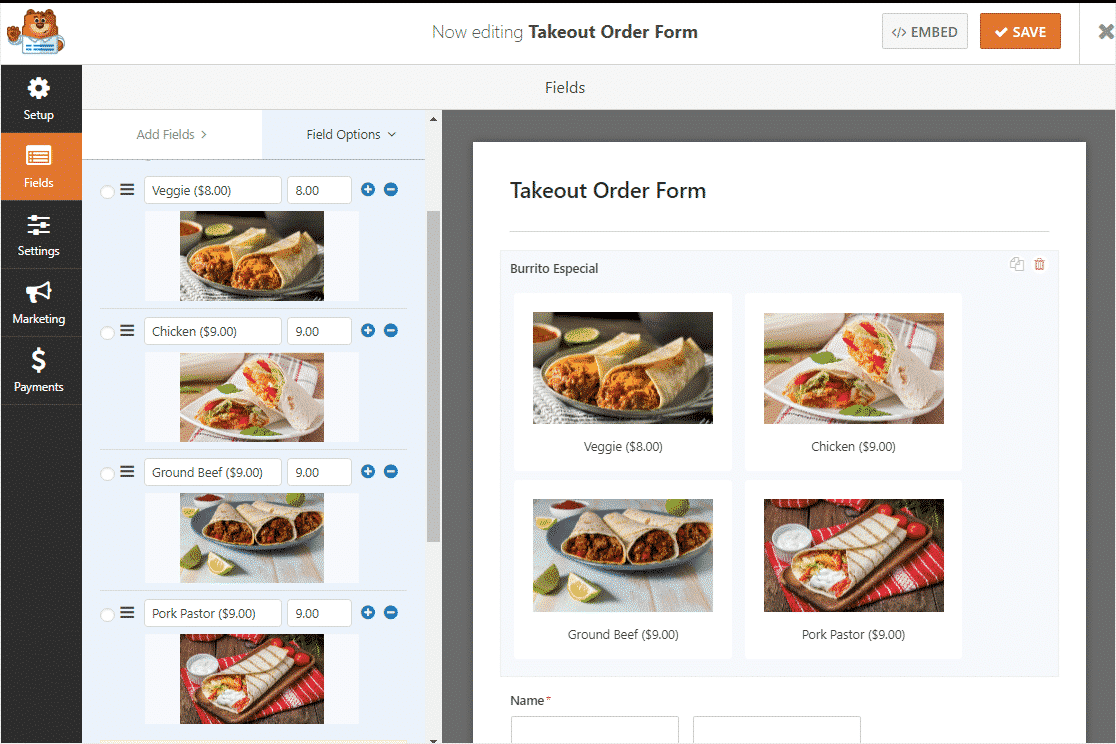
You can repeat this entire step for each menu item.
Now let’s add one more field to your form, the Total field. You can find it in Payment fields.
Drag the Total field from the left panel to your form on the right, wherever you want.
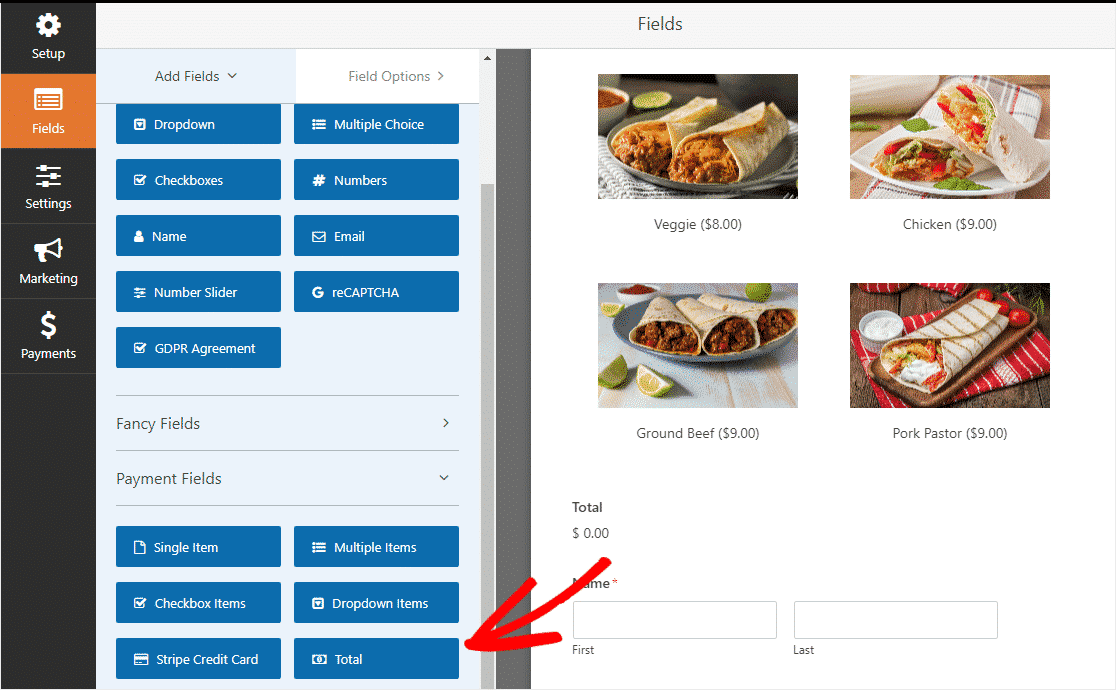
When you’re done customizing your restaurant’s online ordering system form, click Save in the upper right corner.
Step 3: configure your form settings
To get started, go to Settings »» General.
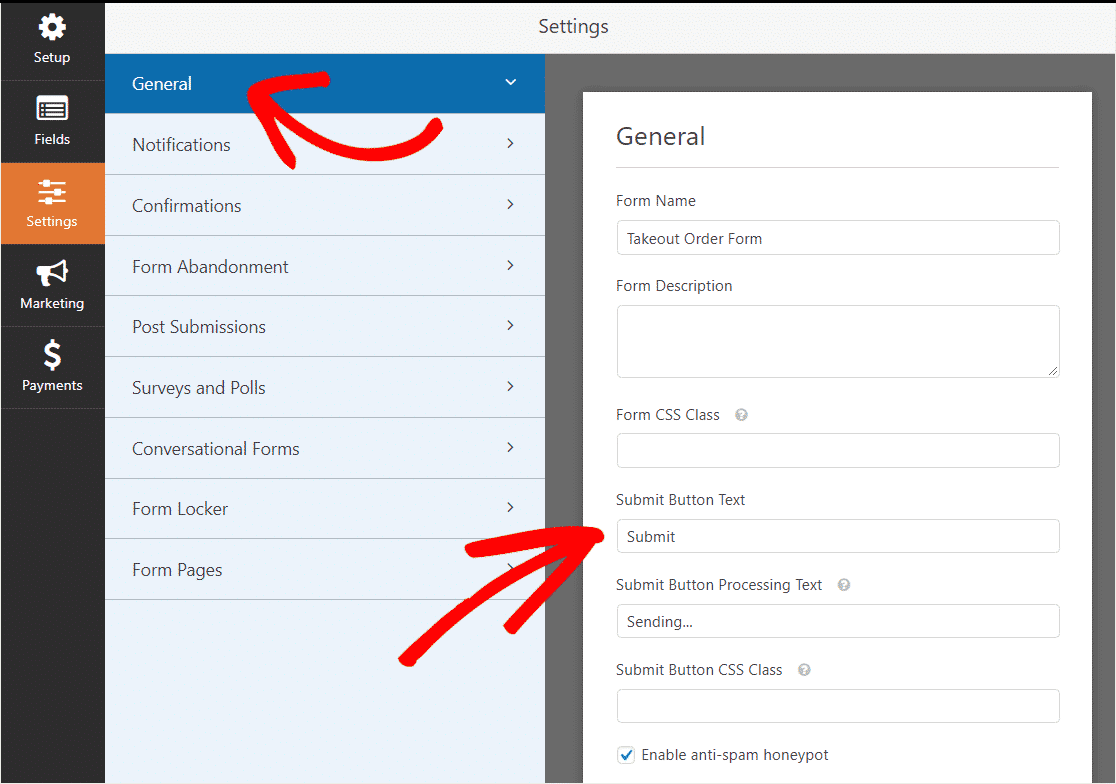
Here you can configure the following:
When you’re done, click Save.
Step 4: Configure your form notifications
When you receive an order from your restaurant’s website, it is important that your team is notified immediately.
Notifications are a great way to send an email every time an online restaurant form is submitted on your website.
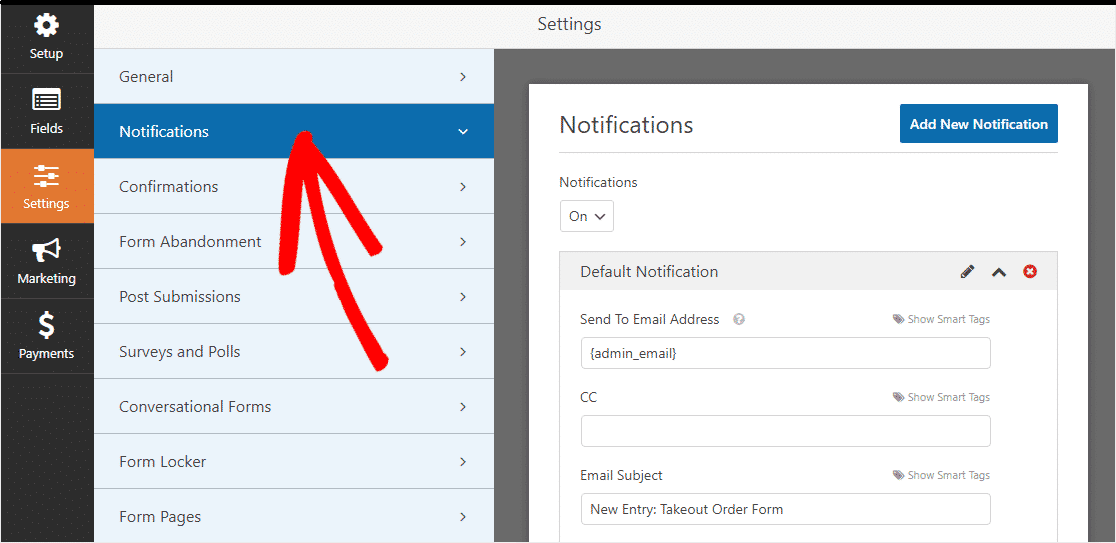
If you use smart tags, you can also notify the user when they complete it, letting them know that you have received their order and that someone will start working on it shortly. This assures people that their application has been approved.
Add images in form
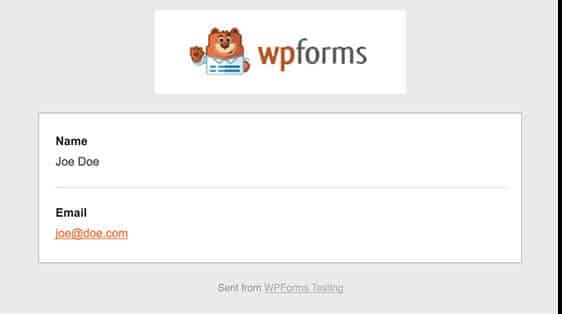
Note: Since the attachment can often damage the deliverability of email, WPForms does not attach files in emails. For example, if an email provider only allows a maximum of 10MB for the attachment but the user uploads a file size greater than 10MB, the email will not be delivered. Instead, we email file uploads as links.

This is a great way to send food orders online to your restaurant staff to make sure they jump out quickly!
Step 5: Customize your form confirmations
Form confirmations are messages that are displayed to site visitors once they submit a food order on your website. They let people know that their application has been approved and offer you the opportunity to let them know what the next steps are.
WPForms has 3 types of confirmation to choose from:
- Message – This is the default confirmation type in WPForms. When a site visitor submits a request, a simple confirmation message will appear informing them that their request has been processed. See some blockbuster posts to help boost user happiness.
- Show Page – This type of confirmation will take site visitors to a specific web page on your site, thanking them for their request.
- Go to URL (Redirect) – This option is for when you want to send site visitors to a different website.
Let’s see how to set up a simple form confirmation in WPForms so that you can customize the message that site visitors will see when they fill out your form.
To get started, click the Confirmation tab in the Form Editor under Settings.
Then select the type of confirmation you want to create. For this example, we will select Message.
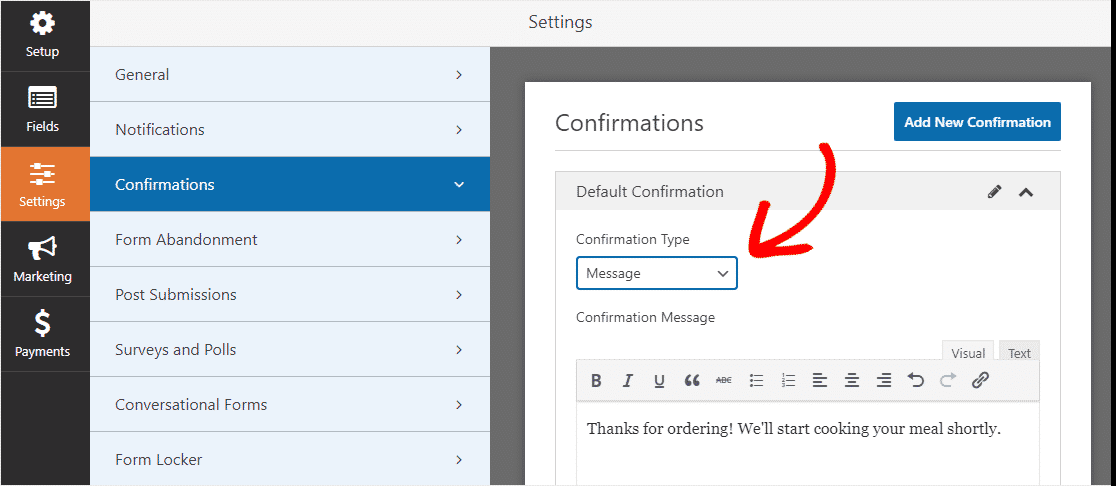
Then customize the confirmation message to your liking and click Save .
For help with other types of confirmation, see our documentation on how to set up form confirmations.
Step 6: Configure payment settings
In order for customers to pay for their restaurant order online, you will need to have at least one payment platform on your website.
You can choose between Stripe or Paypal, or use both.
Check out or post how to use Stripe on your website or see how to use PayPal on your WordPress site.
For this example, we will use Stripe. Once you’ve completed Stripe setup through the tutorials above, simply drag the Stripe Credit Card field from Payment Fields onto the form.
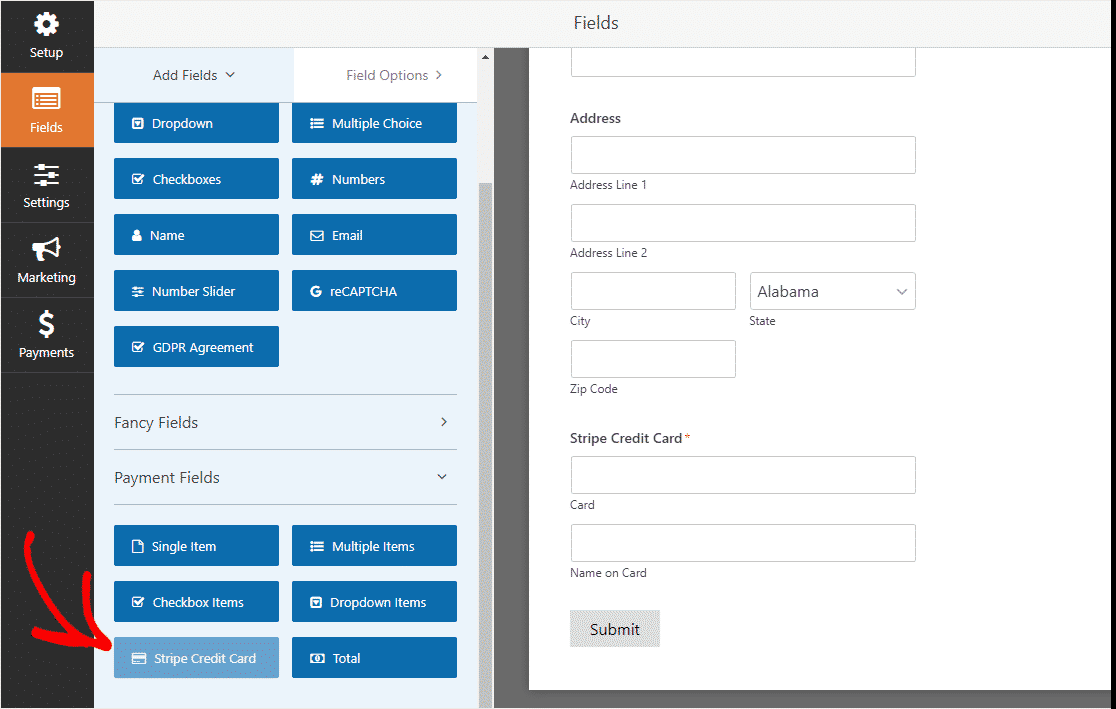
Click Save. You are now ready to add your restaurant’s online order form to your website.
Step 7: Add your restaurant’s online order form to your site
4After creating your form, you need to add it to your WordPress website. WPForms allows you to add your forms to many locations on your website, including your blog posts, pages, and even sidebar widgets.
Let’s take a look at the most common placement option: page / post embed.
To get started, create a new page or post in WordPress, or go to update settings on an existing one.
After that, click inside the first block (the blank area below your page title) and click the Add WPForms icon.
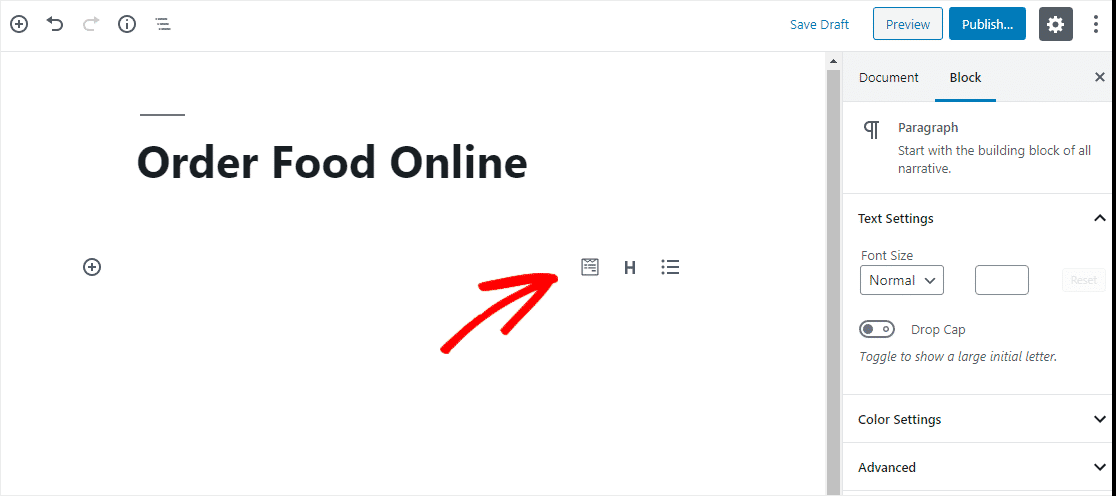
The handy WPForms widget will appear inside your block. Click on the WPForms drop-down menu and choose which of the forms you already created that you want to embed on your page. Select your takeout order form.
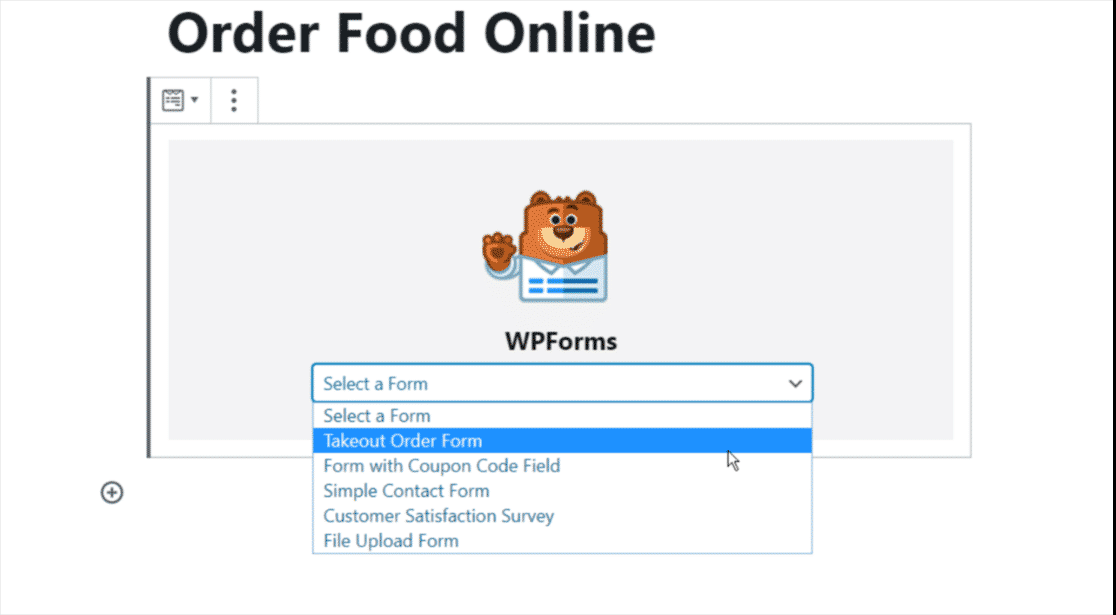
Then publish or update your post or page so that your restaurant order form appears on your website.
To view the form inputs after they have been submitted, check out this comprehensive guide to form inputs. For example, you can view, search, filter, print, and delete any form entry, making the work order process much easier.
Additionally, you can use our Zapier plugin to automatically save file uploads to cloud services like Google Drive and Dropbox.
Final thoughts on a WordPress restaurant ordering system
Well, there you have it. After reading this post, you now know how to easily create a WordPress restaurant order system by creating an online restaurant order form in WordPress.
We hope this tutorial has helped you and your restaurant.
So, what are you waiting for? Try WPForms today. WPForms Pro comes with a free online ordering system for restaurants using the take out order form, plus a 14-day money back guarantee.