Worried about fewer conversions on your website or doesn’t get enough data from your visitors? Don’t worry, here we are to help you.
Dividing a form into several pages helps to increase engagement and improve the user experience, all by fighting the fatigue of the form in order to obtain more conversions of the form. Let’s see how:


Why use a multipage form on your website?
First of all, we must ask ourselves what is a multi-page module? It is simply a form divided into several pages or steps.
Adding multiple pages to your WordPress form i.e. using a multi-page form (also known as multi-part or multi-step) on your WordPress website can increase your site’s form conversion rate. This is because it makes a lighter form that at first glance on a single page could be heavy for the user to fill out. The multipage form makes the form lighter in the eyes of the user.
Here are some other reasons to consider creating a multipage form in WordPress:
Encourage active status: by grouping the form questions, it is possible to divide the information into areas of interest to the user.
Reduction of form abandonment: Users will be more likely to complete the required information when it is divided into pages rather than presented in a single form.
Collect only what you need: you can have a WordPress multi-step form with conditional fields using conditional logic. Show different pages of the form based on the answers given by users.
So, let’s take a look at how to create a multipage form in WordPress.
How to create a multi-part form in WordPress
1. Create a form in WordPress
The first thing you need to do is install and activate the WPForms plugin.
Next, go to WPForms »Add new to create a new form.
You can break any form into multiple parts or steps using WPForms. So, for our example, we’ll create a simple contact form.
In the configuration screen, give the module a name and select the template you want to use, depending on the type of module you are creating. We will choose the simple contact form template for our example.

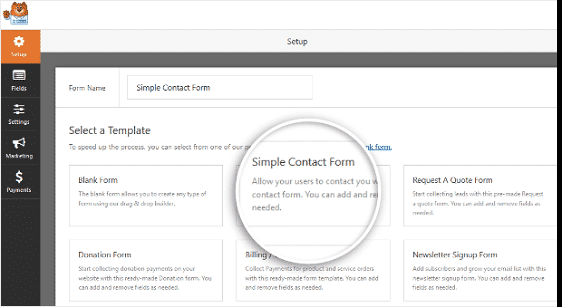
WPForms will now create a simple contact form in the drag and drop builder.

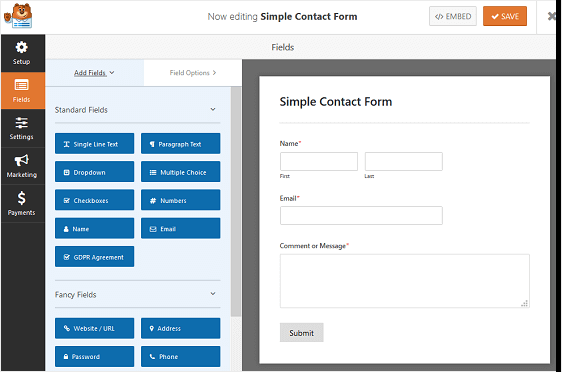
From this area of the form builder, you can add additional fields to the contact form by dragging them from the left pane to the right pane.
With the simple contact form template, you will already have the Name, Email and Comment or Message form fields.
Click on one of the form fields to make changes. You can also click on a form field and drag it to rearrange the order on the contact form.
Now let’s take a look at how to divide the form into several parts and then how to create a multipage form in WordPress.
2. Divide the form into several parts
After you have added and customized all the form fields, you need to add the Page Break field to your site to split it into several pages.
To do this, drag the Page Break field, available in Fancy Fields, from the left pane to the right pane.
Place the field where you want to split the form.
Do it wherever you want your form to split into another page. From there, you can add other fields to complete the form.
WPForms allows you to split the form into as many pages as you want, but remember not to overload your users. Collect only the information you need. You can always collect more information later.
3. Customize the progress bar
Depending on your needs, you may want to show a progress indicator to let users know the different sections of the form. This way they always know where they are in the form and how much is left to fill out before clicking “Submit” based on the progress bars.
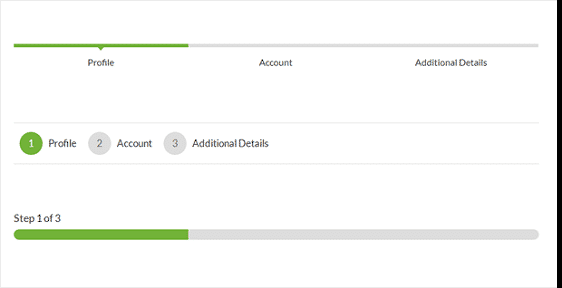
To make things easier for you, WPForms comes with three different breadcrumb-style indicator bars for your multi-step forms:
Connectors: Shows a connection bar and the page titles of each part of the form in multiple steps.
Circles: Shows a circle and title on a page by page basis in the multi-step form.
Progress bar: indicates the progress of the form while the user completes it.

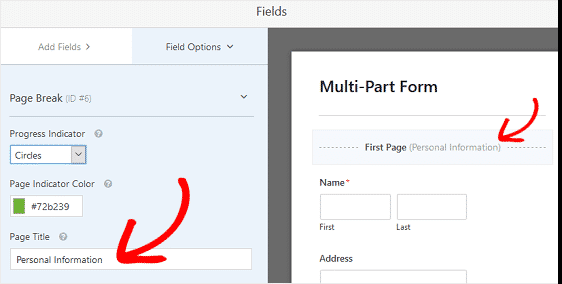
To customize the progress bar and title of the first page of the multi-step form, click on the Page Break of the First Page.

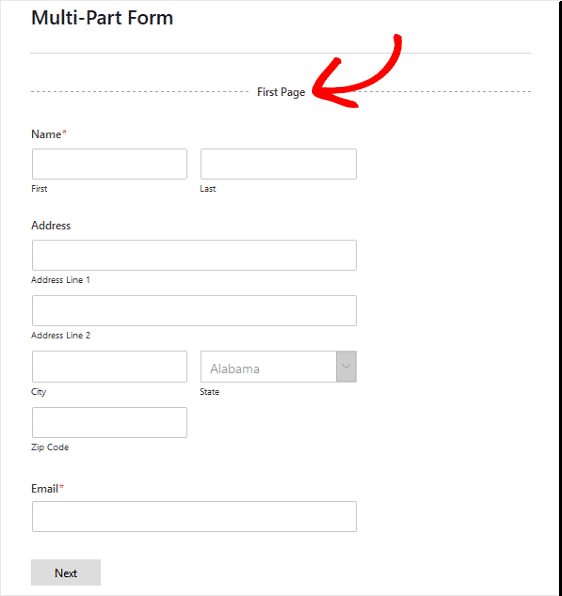
A new panel will be displayed in the Form Editor where you can choose which progress bar you want to use. Here you can also change the color of the progress indicator.
You can also change the title of the page so that users know which part of the form they are on if you choose the Circles or Connectors option. Otherwise, users will only see a standard progress bar that guides them through the number of steps left in the multi-step form.

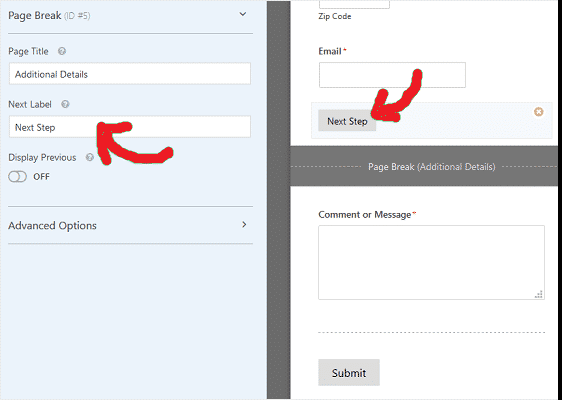
To customize the title of the next page and the button that takes site visitors to the next page of the form, click on the Page Break section created when the page break was added to the form.

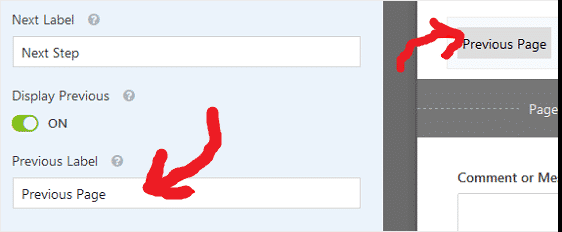
You can also activate the feature that allows you to show site visitors a Previous Page button. This way they can go back to the previous page of the form if necessary.

Once you have finished creating all page breaks and customizing the progress indicator, click Save.
4. Configure the module settings
To get started, go to Settings »General.

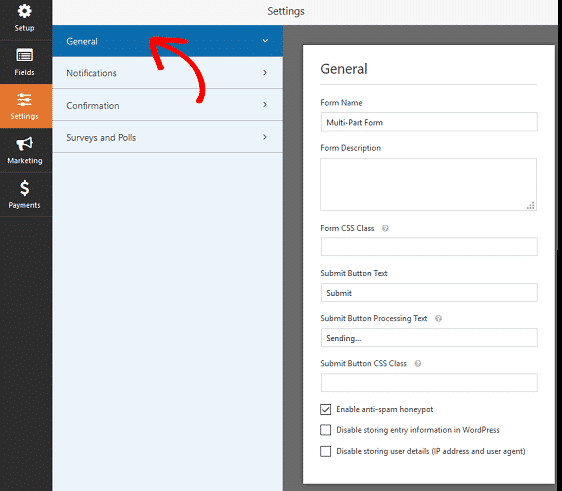
Here you can configure the following:
Form Name: If desired, edit the form name here.
Module Description: Provides a description of the module.
Submit Button Text: Allows you to customize the text on the Submit button.
Spam Prevention: Block contact form spam with honeypot or Google reCAPTCHA feature. The honeypot feature is automatically enabled on all WordPress modules, so if you decide to use another form of spam prevention, click on this option.
AJAX Forms: Enable AJAX settings without reloading the page.
Improvements to the GDPR: It is possible to disable the storage of compiled information and user details, such as IP addresses, in an attempt to comply with the GDPR requirements.
When done, click Save.
5. Configure module notifications
Notifications are a great way to stay up to date with users filling out your forms.

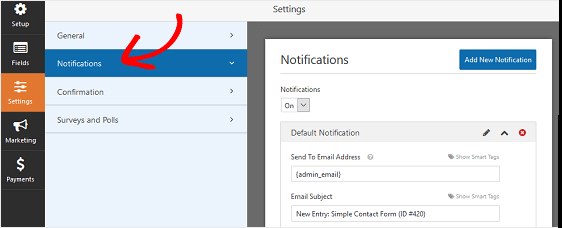
In fact, unless you disable this function, every time someone submits a multipage form from your site, you will receive a notification on submission.
If you use smart tags, you can also send a notification to the user’s e-mail address when they submit a form, telling them that you have received it. This assures site visitors that their form has been properly reviewed.
It is also appreciated as a service when dealing with multipage forms that may take a long time to fill out. The last thing a site visitor wants to ask himself is whether the long form he has just filled out has reached its destination.
6. Configure form confirmations
Form confirmations are messages that are displayed to site visitors once they have submitted a form on your website. They let people know that their form has been processed and give you a chance to let them know what’s next steps.
Again, this is especially useful when it comes to long forms on your website.
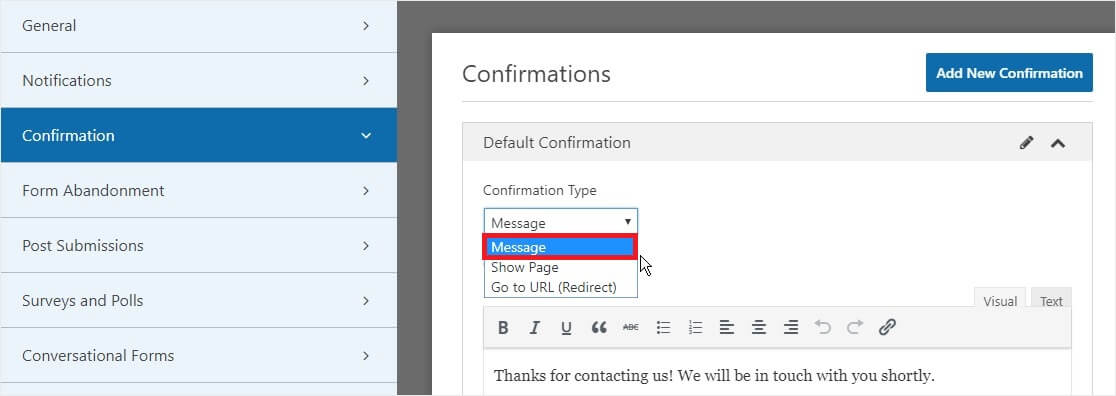
WPForms has three confirmation types to choose from:
Message: This is the default confirmation type in WPForms. When a site visitor submits a form, a simple confirmation message will be displayed stating that the form has been processed.
Show Page: This type of confirmation will take site visitors to a specific web page on your site thanking them for submitting the form.
Redirect (Redirect): This option is used when you want to send site visitors to a different website.
Let’s see how to set up a simple form confirmation in WPForms so you can customize the message that site visitors will see when they submit a form on your site.
To get started, click on the Confirmation tab in the Form Editor.
Next, select the type of confirmation type you want to create. For this example, we will select Message.

Then, customize the confirmation message to your liking and click Save.
You are now ready to add the contact form to your website.
7. Add the multipage form to your WordPress site
After creating the multi-step form, you need to add it to your WordPress website.
WPForms allows you to add your forms to multiple places on your website, including pages, blog posts, and sidebar widgets.
Let’s take a look at the most common positioning option: page/post embedding.
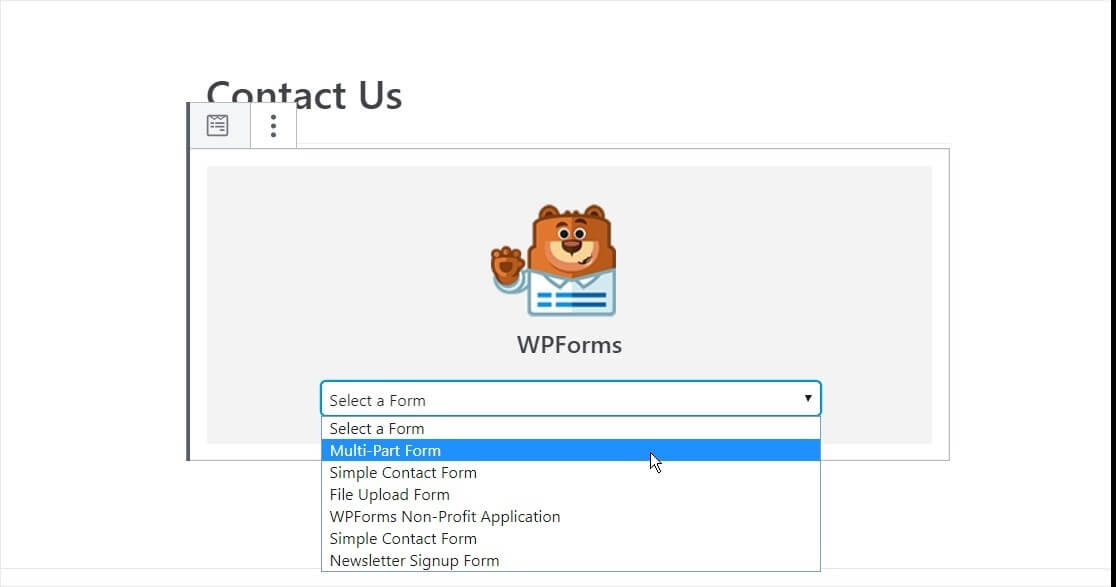
To get started, create a new page or post a WordPress post or go to edit settings on an existing one. Next, click inside the first block (the empty area under the page title) and click on the Add WPForms icon.
The WPForms widget will appear inside your block. Click the WPForms drop-down menu and choose which of the forms you have already created you want to insert on your page. Select the form you just created.

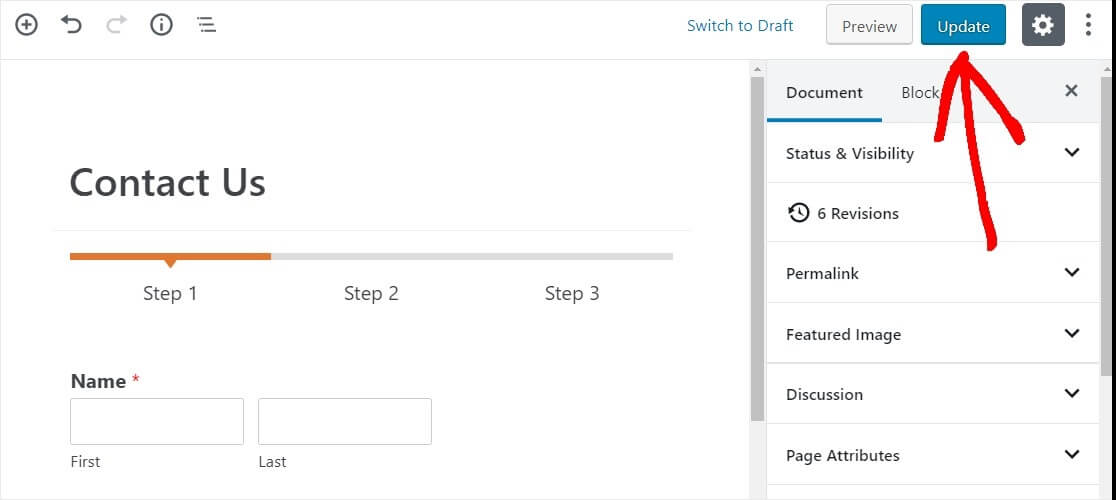
Then publish your post or page so that the contact form appears on your website.
Next, click on the blue button in the top right that says Publish or Update, then the form will show up on your website.

That’s all! We hope this guide has helped you learn how to create a multipage form in WordPress in order to improve the user experience and conversion rate.
Transparency Disclosure:
Teknologya’s content is reader supported, which means that if you click on some of the links in this post, we may earn a small referral fee. Please note that we only recommend products that we use ourselves and/or that we believe will add value to our readers.