The Android Software Development Kit (SDK) is a set of tools that developers and programmers use to build apps for smartphones and tablets running
Google’s operating system.
The SDK can also be useful for a number of other use cases, including manually installing software updates and even gaining root access (superuser privilege). But for that you need to install Android Studio on your Windows or Mac computer. Learn how to:

How to Install Android SDK on Windows
- Open your browser and go to the Android Studio website.
- Click o
n “Download Android Studio.” - Select “I have read and accept the above Terms and Conditions” and click “Download Android Studio for Windows.”
- The download of an executable file will start. When done, open the file.
- The traditional Windows dialog box will appear asking if you want to allow this application to make changes to your computer. Choose that “Yes”.
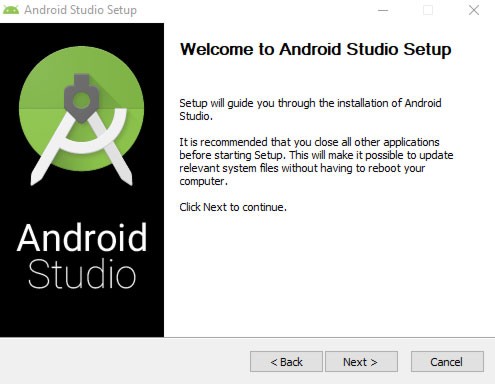
- The installer wil
l open welcoming you. Select “Next.”
- You will find the component selection screen. If “Android Virtual Device” is not already selected, check it.
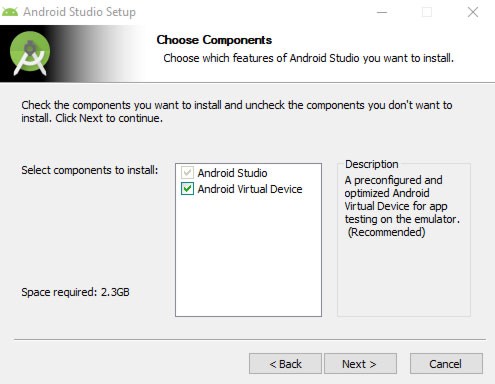
- Then click “Next” again.
- The installer will ask you to set a location on your storage drive to install the program. You can choose the default option or click “Browse” to select a different folder.
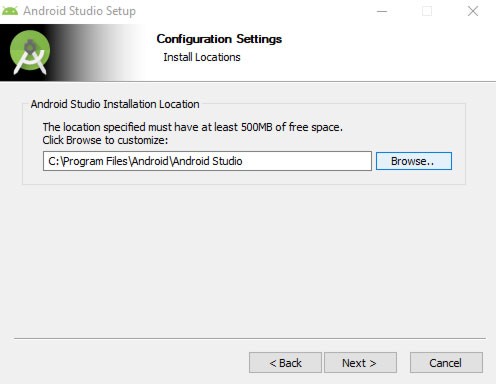
- Once again, press “Next”.
- Click on “Install”.
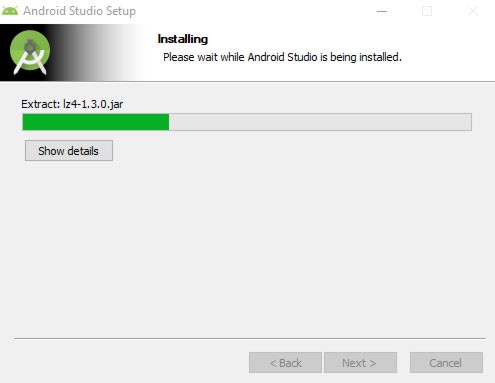
- The installation will start and your progress will appear in the installer window. If you would like to see more advanced information about the process, click on “Show Details”.
- When the process is complete, click “Next.”
- Press “Finish” to complete the installation. If you do not clear the “Start Android Studio” check box, the program will start.
- A window appears asking if you want to import settings from an earlier version or from an external file. If you have no backups to import, keep “Do not import settings” checked and click “OK.”
- Google will then ask if you want to allow them to collect anonymous data from your use of Android Studios. This includes details about the features and tools you use and the way you configure plugins. Choose the option you prefer, but note that the app may ask more questions depending on your answer.
- The window for a new Android Studio project will open. Click the SDK Manager button – it has a cube icon with a down arrow.
- The SDK Manager window will appear, where you can select the platform packages you want to download. Options are available from Android 2.1 (Eclair) to recent Android 10 (Q).
19. Press “OK” and the Android SDK will be installed and configured.