Just arrived in the world of Nintendo? We’ve put together some tips to care for your pair of Joy-Cons and also solve some problems to improve the performance of the controls. See how to update, load, configure and calibrate the Joy-Con.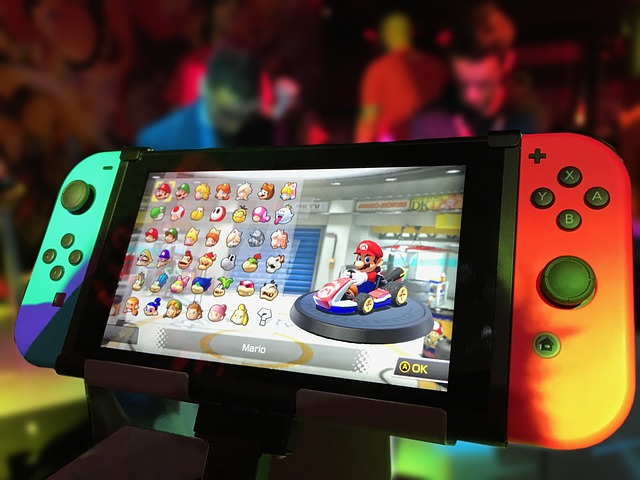
1. How to charge Joy-Cons
Just connect them to the Nintendo Switch while it is in the dock. That simple.
That’s the issue you shouldn’t worry about, because the estimated battery life for the Joy-Cons is about 20 hours, while the Switch’s maximum battery life is 9 hours for the new model and 6.5 hours for the old one.
Joy-Cons Drums shouldn’t be a problem, but if you play a lot on TV, remember to plug them in whenever you finish playing so it will be difficult to drain the battery.
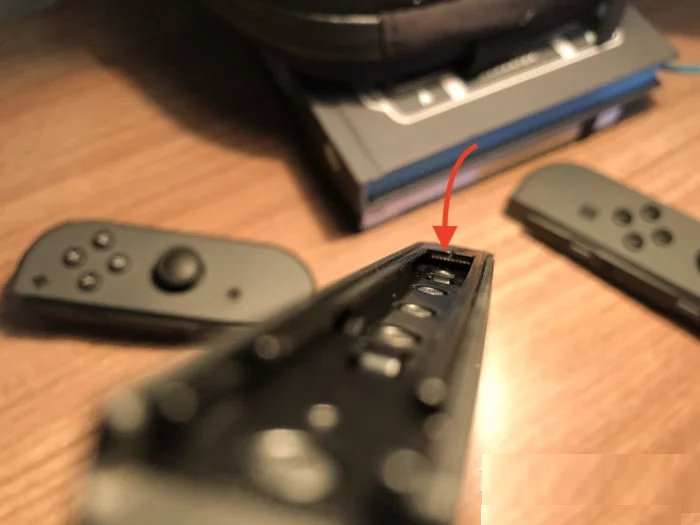
Joy-Con charging and syncing contacts are on the Switch bus
I usually leave the switch in the dock when I go to sleep, so it charges the console and controls at night. Oh, and before the question is asked:
the battery won’t be addictive if it goes straight to the dock.
Nintendo also offers accessories to
charge the Joy-Cons separately from the console in case you have more than one pair of controls, but options must be purchased separately.
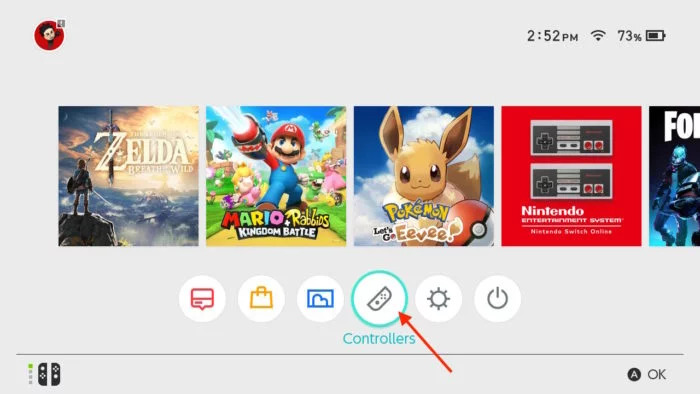
To view the controls battery status: On the Home screen, click Controls (Joy-Con icon), the information will be displayed individually for the console and Joy-Cons.
2. How to update Joy-Con
The option to upgrade Joy-Cons can be found at:
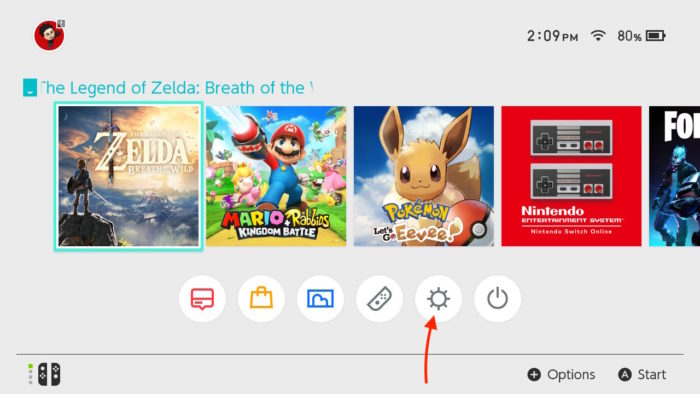
- Access the settings (gear icon);
- In the left pane, select Controls and Sensors;
- Then go to Update Controllers;
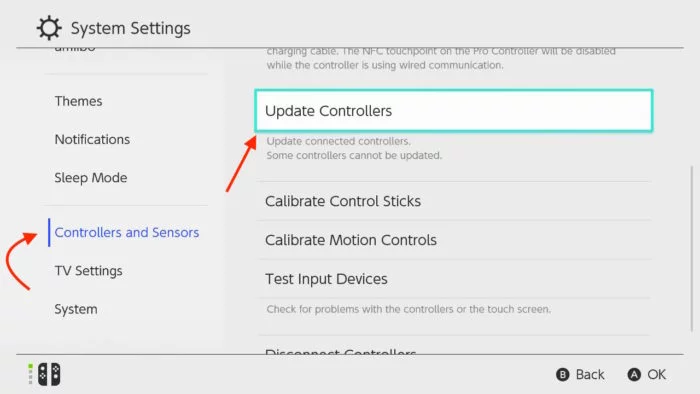
- Wait for the process if updat
es are pending.
Why update the controls?
Nintendo Switch owners have come across a number of Joy-Cons issues. The first of these is the analog drift, which makes the character “walk alone” in some cases. Another problem is related to the loss of wireless control signal.
Upgrading does not guarantee that problems will be fixed, but it can correct bugs and inconsistencies in Joy-Con firmware and prevent other problems.
Nintendo does not make clear what is included in these fixes, but it is always important to keep all your systems up to date.
3. How to configure other Joy-Cons
Assuming you have purchased new Joy-Cons, either to play Just Dance or Mario Kart 8 Deluxe with more people or because your old ones have broken. You will need to configure them so that the Switch understands that they are part of the same console.
Configuration is done in two steps:
- Pair the new controls;
- Configure the order of the controls.
There are two ways to pair the Joy-Cons: the first consists of jus
t plugging the controls into the switch, the second (in case you’re away from the console):
- On the home screen, click Controllers (Joy-Con icon);
- Select Change Grip/Order;
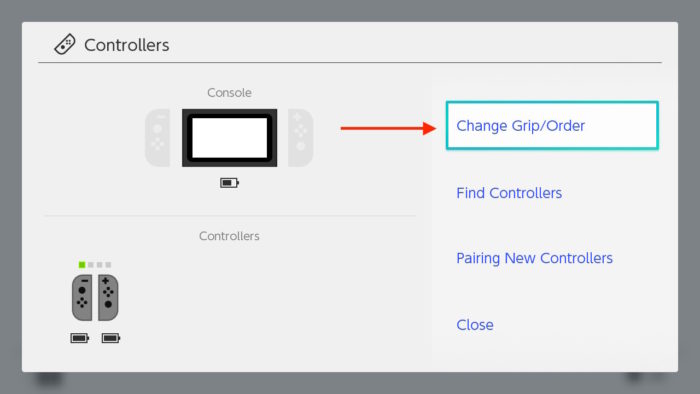
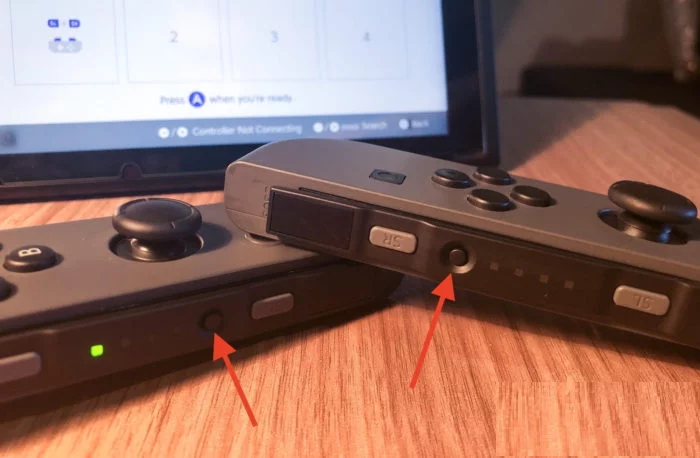
- Once you are on this screen hold the Joy-Con sync button (this is the loop between SR and SL);
- A popup will appear on the screen that says “Paired.”
This done, just change the order of how the Joy-Cons will be used, on the same screen for control synchronization.
Note that the Switch asks to press both buttons at the same time: L + R to use Joy-Cons together or SL + SR to use them separately.
By doing so, you can split the controls by selecting the order of the players.
Reminder: The Switch supports up to 8 controls, each Joy-Con counts as one control even if they are being used by one person. Example: 4
people can play with a pair of Joy-Cons each or 8 people can
play with a Pro Controller each.
4. How to calibrate a Joy-Con
In the system, there are two possibilities for Joy-Cons calibration:
- Analog calibration;
- Calibration of motion sensors.
Calibrating controls can help improve some misinterpreted or inaccurate commands in the game, but it is not a guarantee that it will
correct problems such as drift.
Important: Nintendo recommends that calibration be performed only if there is a problem with the Joy-Con.
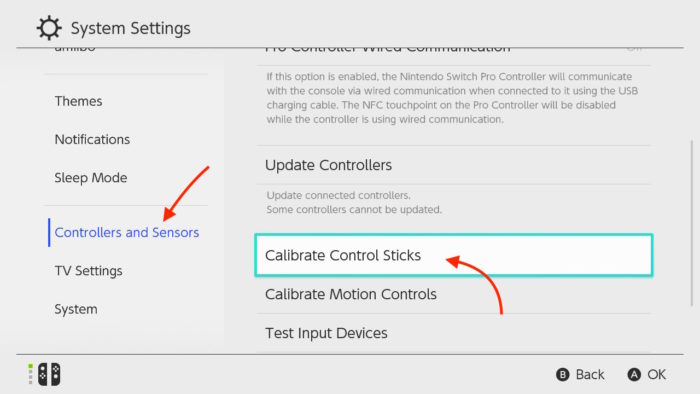
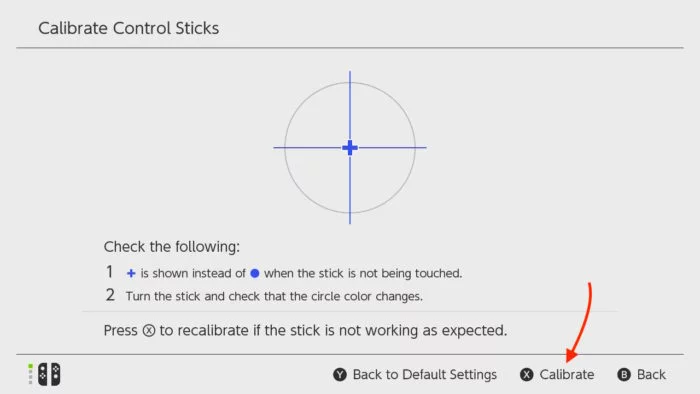
To calibrate the analog:
- Go to the settings (gear menu in the home screen);
- Access the item Controls and Sensors;
- Select Calibrate Control Sticks;
- Tighten the analog you want to calibrate;
- Press X and follow the on-screen instructions to move the control as directed.
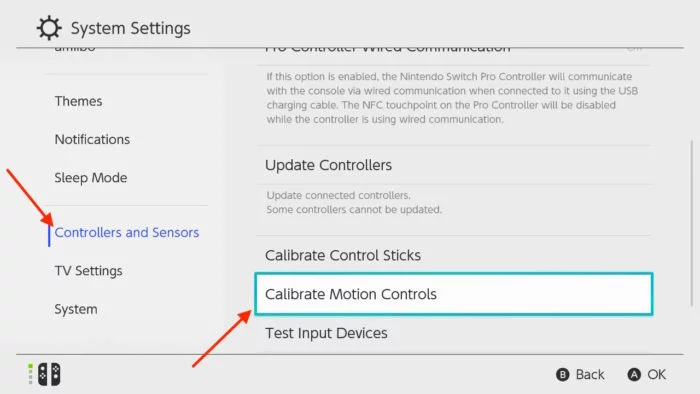
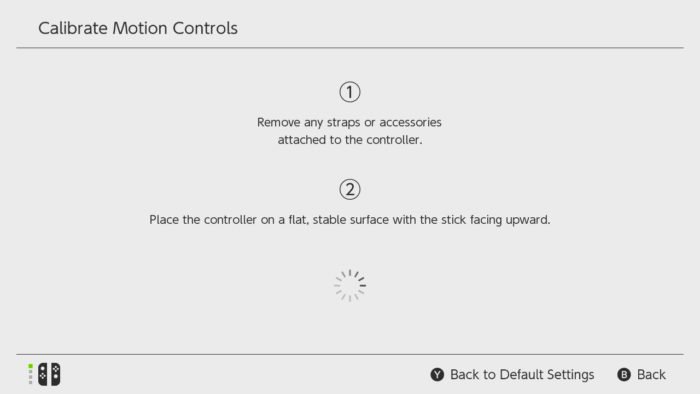
To calibrate motion control:
- Go to the settings (gear menu in the home screen);
- Access the item Controls and Sensors;
- Select Calibrate Motion Controls;
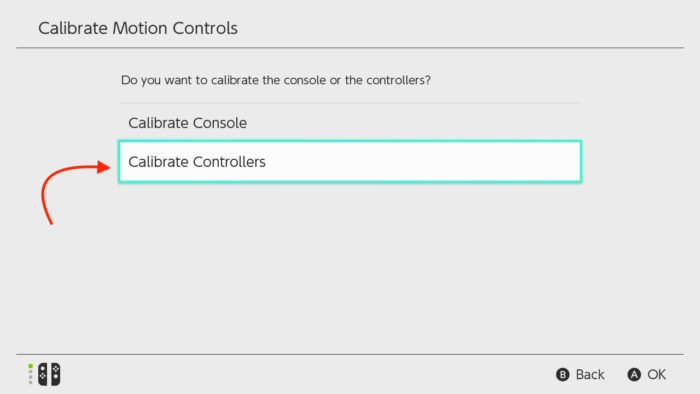
- Select Calibrate Controllers (can also calibrate the Switch itself);
- Hold the button indicated for the controller you want to calibrate;
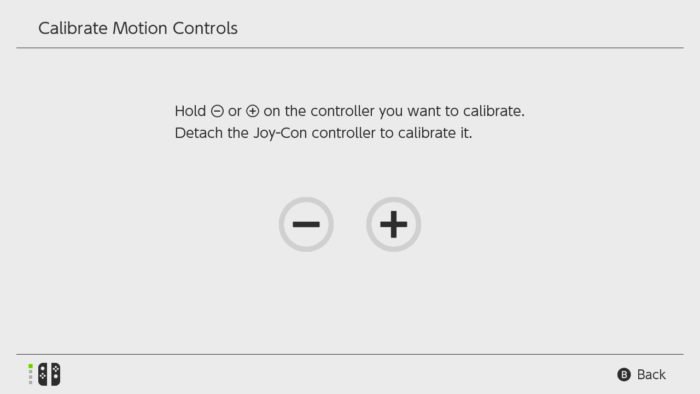
- Remove the Joy-Con Strap (wrist attachment) or Grip, leave the control on a flat surface with the control stick facing up and wait for
best online pharmacy with fast delivery periactin online with the lowest prices today in the USA
calibration.
5. Ask Nintendo Support (Joy-Con drift) for help
If Joy-Con has been affected by the drift problem, the solution is to contact Nintendo Support and request a repair of the controller. Even out of warranty, the company has been repairing the defective Joy-Cons for free to Switch owners and reimbursing those who have already paid for the repair on official support.