The DNS (domain name system) are used to assign names to network nodes, and can replace traditional IP addresses. The advantage that a DNS offers lies in the fact that it is possible to assign a textual name to a server, which is very convenient when it comes to storing a web page. For this reason, a DNS is fundamental in the diffusion of the internet, especially for users. less experienced. The DNS system is made up of several servers (DNS servers) that allow us to access websites through a translation process browser and IP address of the page we want to connect to.
Usually, the DNS server settings are preset by the ADSL/Fiber operator that provides you with the modem, or by the mobile SIM operator. This does not detract from the fact that it is possible to modify these configurations, for several reasons:
- Access to darkened sites: telephone operators often block sites at the DNS level.
- Security and Privacy: using the right DNS ensures greater security when surfing the net, as unsafe sites are blocked and your access will not be recorded.
Let’s see, therefore, how to change the DNS on Android.
Change the DNS on Android
Changing the DNS on Android is possible, either by using the Wi-Fi connection, or by using your mobile data. Before proceeding with the DNS configuration, we show you which are, in our opinion, the best to have on your smartphone:
Google DNS are the most used and reliable ones that you can find:
- 8.8.8.8
- 8.8.4.4
OpenDNS DNS are an excellent alternative to Google’s:
- 208.67.222.222
- 208.67.208.208
Change DNS on Android using a Wi-Fi connection
If you want to change the DNS using a smartphone connected to the Wi-Fi network you will have to follow a few simple steps:
- Open the Settings
- Continue on Connections and then on Wi-Fi
- Press and hold on the network you are connected to, until a pull-down menu appears
- Tap on Manage network settings
- Continue on DHCP
- Tap on Static (to set the static IP address)
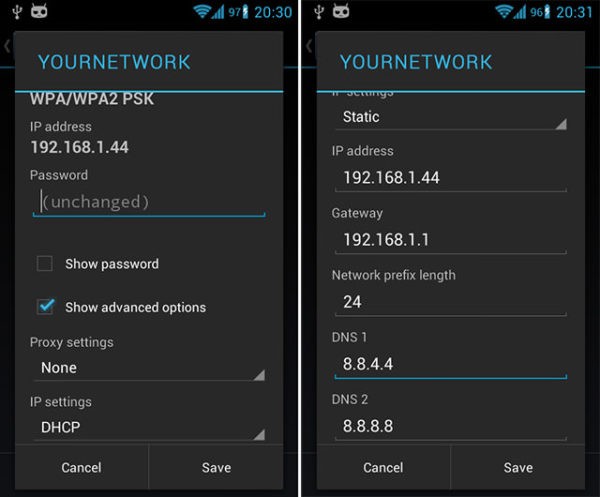
At this point you will have to enter the two addresses provided previously in the space reserved for DNS 1, and DNS 2. For example if you use Google DNS:
- DNS 1: 8.8.8.8
- DNS 2: 8.8.4.4
Now all you have to do is save, and you’re done.
Change DNS on Android using mobile data
If you use a smartphone with a mobile data connection, all you have to do is download an application that will allow you to change the DNS in a very short time.
- Download and install DNS Changer
- Launch the application
- Click on Start, then OK
- Confirm on Start
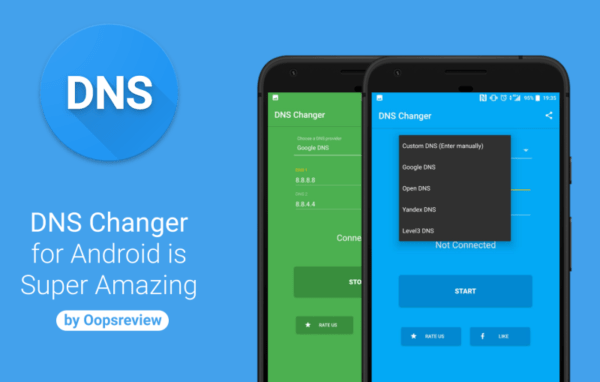
As mentioned before, in a matter of seconds you will have solved the problem, as the application will do its job autonomously.
- These are the methods for changing DNS on Android using Wi-Fi connection or mobile data connection. If you want to deepen your knowledge on DNS and find out which are the best to use (not only on Android), I recommend you read our guide where we explain in detail what DNS are and which to choose.