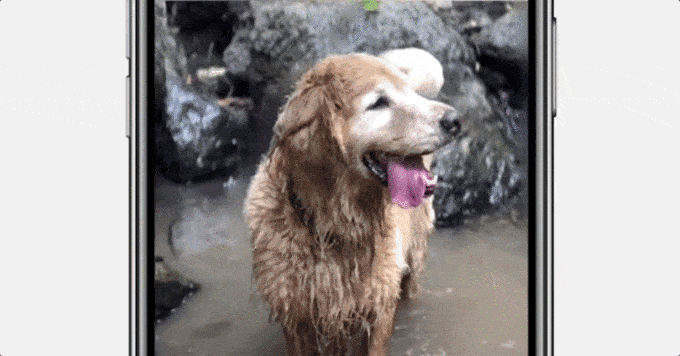
Facebook uses artificial intelligence features to transform any 2D photo into a 3D photo. Do not understand anything? The social network itself explained in an article how magic works on the platform and gave tips on how to create a 3D photo on Facebook. If you haven’t linked the name to the thing yet, those ar
e the “moving” photos in the feed.
3D photos on Facebook were launched in 2018 as a new and immersive format for sharing images on the social network. However, 3D photos depended on the use of “portrait mode” in devices with dual lenses, from more advanced cell phones.
“Using advanced machine learning techniques, we are able to produce 3D images from any standard two-dimensional photo. This is possible thanks to a new system that infers the 3D structure of any image, be it a new photograph taken from a cell phone. Android or iOS (iPhone) with a single camera or an image from decades ago recently uploaded to a smartphone, tablet or PC”, explains the team.
More affordable 3D photo
This breakthrough makes 3D photo technology easier and more accessible to millions of people who use single-lens camera phones – not dual or triple cameras.
The feature also allows you to try family photos and other images that have already been taken in a new way, converting them into a 3D photo. Anyone with an iPhone 7 (or higher) or the latest Android can try.
Anyone who wants to understand the technology behind the neural network and tests on public images, visit the Facebook Blog article. To learn how to make one, follow along.
How to create a 3D photo on Facebook
Note:
- To create 3D photos on Facebook using your computer (not just your phone), you will need to create a depth mapping file. Without this feature, just enter the Facebook application for iOS (iPhone) or Android.
- You can share 3D photos in three areas: in the News Feed, in Groups or Pages. You will need to be an administrator or editor to publish a 3D photo.
About 3D photos
- Once published, 3D photos cannot be edited. If you try to edit a common photo (already posted on your social network profile) using Facebook, your computer or a third-party application, you will not be able to convert it to a 3D photo;
- If you want to share a 3D photo, you cannot add multiple photos to a single publication. Only one 3D photo can be shared at a time;
- Currently, 3D photos cannot be added to an album;
- If you are publishing a 3D photo using a Page, please be aware that 3D photos cannot currently be boosted or used in ads;
- Please update to the latest version of your browser before starting to do.
On Android
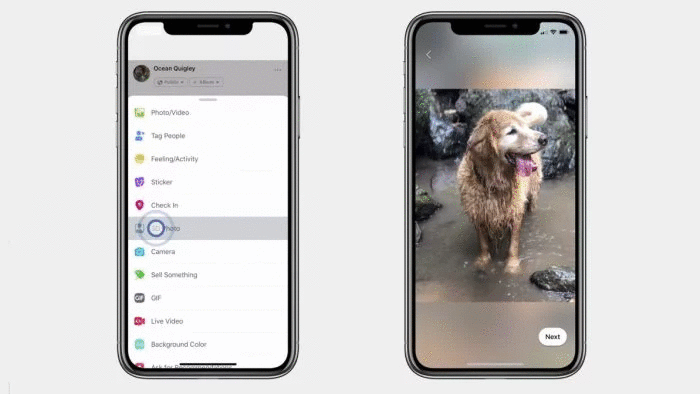
To create a 3D photo on Android, open the Facebook app using a smartphone that has a “Portrait Mode”, “Lens Blur” or “Live Focus Mode”.
- Open Facebook on Android;
- Touch “What are you thinking about?” (do not touch photo);
- Scroll down the screen and tap “3D Photo”;
- Select the photo you want to use in the 3D post;
- Touch “Share” or “Publish”.
Note that, in step 4, the draft of the post may or may not show signs that the 2D photo has become a 3D photo. Once published you will see the result and can redo it.
It may be that not every photo looks perfect when the 3D effect is applied. Test with similar clicks from other angles or with photos with more pixels and higher quality.
On iPhone (iOS)
- Open Facebook on iOS;
- Touch “What are you thinking about?”;
- Touch Photo or Video;
- Select a photo (mandatorily) in Portrait mode;
- Tap Finish;
- You will see a “Make 3D” icon if the photo qualifies;
- Touch Make 3D and touch “Share” or “Publish”.
To remove the 3D effect, tap Remove 3D in the upper left corner of the photo.
On the computer
To publish a 3D photo, save two files to your computer:
- The image you want to use: save it in .png or .jpg format.
- An image depth map: you need to have “_depth” attached to the file name (like myImage_depth.png) and the same aspect ratio as the photo used.
Now, you will create your 3D photo:
- Click Photo/Video at the top of the News Feed;
- Select the two files (the image and the depth map);
- Drag and drop them onto the post draft;
- When the files are added, the 3D im
age will be created; - Click “Publish”.
You may be asking yourself: how to create an image depth map?
This can be done in Photoshop. I recommend the Omnivirt tutorial, in particular.
| Original photo | Depth map | Resulting 3D photo |
|---|---|---|
 |
 |
 |
What is a depth map?
A depth map is an image that contains information about the distance between the surface of objects and a particular point of view. It is created from a source image and is usually in grayscale format.
When merged with the source image, a 3D image is created. Then, when published on platforms, it will be as if the original photo had depth.
Any photo look good?
Do not.
The most important step in the whole process is choosing the right photo to transform. While it is true that any 2D photo can become a 3D photo, some images work better than others. Avoid images that are too flat or without backgrounds.
Try to use images that contain at least three layers of depth in your content: first, second and third planes (portraits, landscapes, with bokeh effect).