
A complete guide on how to unroot your Android smartphone, so as to recover the official warranty.
Running the Android root allows, among other things, to install a Custom ROM, ie a modified version of the Android operating system, thanks to which it is possible to keep a phone updated that will no longer receive updates from the manufacturer. Just as there are benefits to rooting a smartphone, at the same time there are also risks, which often exceed the former. In fact, the biggest danger is having a more vulnerable phone, due to the download of apps that could steal your personal information online.
For this reason, removing the Android root is an essential operation if you want to maintain a certain level of security. Contrary to what one might think, the unroot (as the inverse root process is called) does not eliminate either the Custom ROM or the customized Recovery, that is the modality of starting the modified system with respect to the original one, by which one has the opportunity to install as many ROMs as you want.
Below we will explain how to unroot Android, illustrating some of the simplest procedures available to users. This is a rather trivial operation, certainly within the reach of all those who have succeeded in obtaining root permissions. For those who have encountered difficulties in rooting the phone, we recommend our step by step guide to rooting Android.
How to remove Android root
- Android unroot with SuperSu
- Android unroot with KingoRoot
- Remove the Custom ROM and restore the original firmware
Remove Android root with SuperSU
SuperSU is the program that manages administrator permissions on a smartphone where the Android root has been made. Apps that only work on phones with root need approval from the permission manager (ie SuperSU) in order to work properly. Once they get permission, these apps can act like real malware inside the phone.
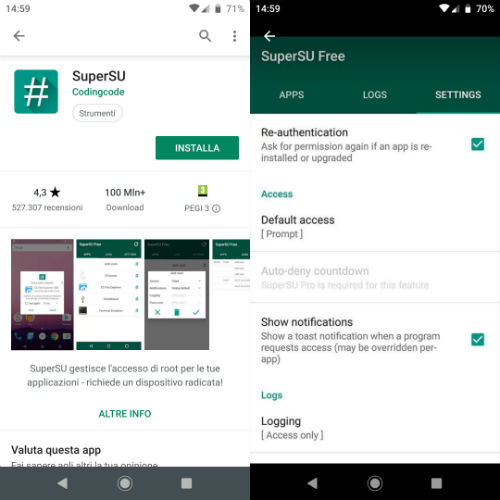
Fortunately, among its features, SuperSU also has the task of unrooting Android with a tap. The procedure to follow is very simple. First you need to open the SuperSU app, previously installed through Custom Recovery (TWRP), select Settings, then tap on the Complete Unroot option and press the Continue button to confirm.
In this way, the SuperSU “superuser” is removed. After its removal it will be impossible to download the apps that require root permissions to work, including apps for spying on Facebook, Instagram or WhatsApp. Instead, you can continue to use the “custom” ROM without any problems.
Unroot Android with KingoRoot
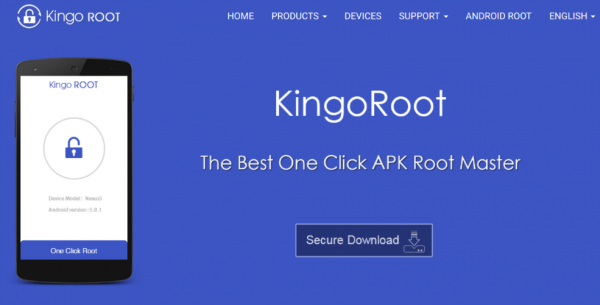
SuperSU is just one of the permission managers that you can use to root the phone. One of the best alternatives is called KingoRoot: the operation is identical, both in granting the permissions to the app and in removing the access to the administrator permissions of the Android smartphone with a touch. The operation can be performed either via the Windows PC software or directly from the KingoRoot APK. As easily predictable, the simplest method is the one involving the use of the APK.
On the phone’s home screen we find the SuperUser app and open it, then select Kingo ROOT. In the new window that opens we tap on the icon of the three dots and from the menu that opens we click on the Remove Root option, then we continue with a tap on the Continue button. At this point the unroot is completed. Only wait for the device to restart automatically to be able to use the phone again without administrator permissions.
Keep in mind that if a Custom ROM was installed first, for example LineageOS (formerly CyanogenMod), removing the root in no way invalidates the user experience. The only difference is the inability to use apps that require root permissions to work completely. For the rest, the phone will look the same as before, including support for custom recovery (independent of the program used to change the original boot mode with limited functions).
As we said, the procedure can also be performed from a PC by installing the KingoRoot program on the computer. If for any reason you prefer this method than the one operated on the smartphone, here are the steps to follow. First you need to connect to this link to start downloading the executable file.
Once finished, we open the KingoRoot.exe file and follow the installation wizard of the program, accepting the terms of use of the service and continuing ahead with a click on Next. At the end of the operation select the Finish button to close the installation window.
Before continuing, download the phone drivers for your computer so that the PC recognizes the smartphone when it is connected to the USB port. The following links provide the official addresses for each company:
The next step is to enable USB debugging mode on the phone, so that the smartphone is recognized by the KingoRoot program. On the latest smartphone models it is first necessary to activate the developer options: open the settings, select the item System and tap on About phone.
Then scroll down to Build Number and tap seven times consecutively, until the developer activation message appears. Then go back to the settings, select the System item, press on Developer options and move the lever next to the USB debugging item from left to right (ON position).
At this point it is possible to proceed with the removal of the Android root with KingoRoot via PC. We leave the smartphone connected to the computer via the USB cable while starting KingoRoot with a double click on the program icon. As soon as the system recognizes the device, the Remove Root and Root Again buttons will appear in the application window. Press on the Remove Root button if we intend to remove the root from the mobile.
On the contrary, if we click on the Root Again button we will do nothing but submit the Android device to the root a second time, going to install SuperUser , the permission manager of the KingoRoot program, with all the risks that this entails in relation to the security of the personal data.
Remove the Custom ROM and restore the original firmware
Several users tend to confuse the Android root with the installation of a Custom ROM. So these same people when they ask themselves how to take root actually are looking for information on how to remove the Custom ROM from their device to get back to the original firmware.
In this regard there are two important things to know:
- Do not delete the Custom ROM with a simple Delete from the customized Recovery, because otherwise at the next restart of the smartphone you will be without an operating system (unusable phone)
- When the official firmware is installed a second time, the customized Recovery is replaced by the Recovery stock (ie the original one).
Before proceeding, make sure you have installed the ADB and Fastboot program ( click here for download) on your computer, software mainly used to unlock the smartphone bootloader and “flash” the customized Recovery.
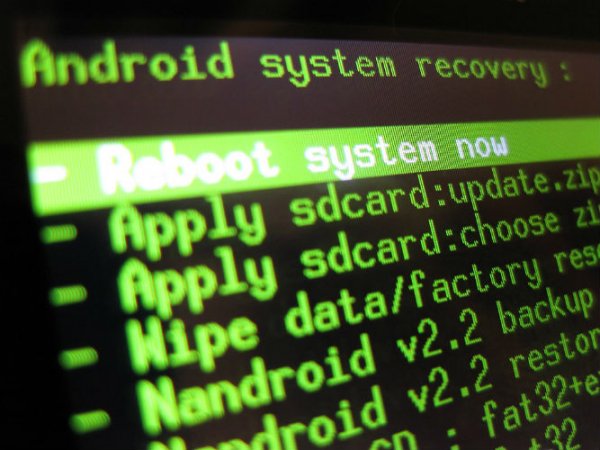
After installing ADB and Fastboot, download the official Android phone firmware. If, for example, you have a Google Pixel, the reference page is located at this address. Next, transfer the file to the same folder where the ADB and Fastboot program was installed, then restart the phone in Fastboot mode by pressing simultaneously and continue on the Volume down and Power keys .
Now connect the phone to the PC using the USB cable, open the command prompt in the same folder where ADB and Fastboot are installed, then type the following command to flash the original firmware on the phone:
- Flash-all.bat
If the steps have been performed correctly, the smartphone will restart automatically. You will have to repeat the initial configuration of the phone from scratch, so it will take a few minutes before you can use the device again. Remember to backup Android before installing the original firmware, in order to recover the data previously saved in the phone’s internal memory.
Furthermore, we suggest you check if you need to update Android to a new version, since it may happen that you install a firmware that has a version dated compared to the current one. To check whether or not there are updates available, you need to open the settings, select the System item, then tap on the System Updates option and wait for the process to complete.