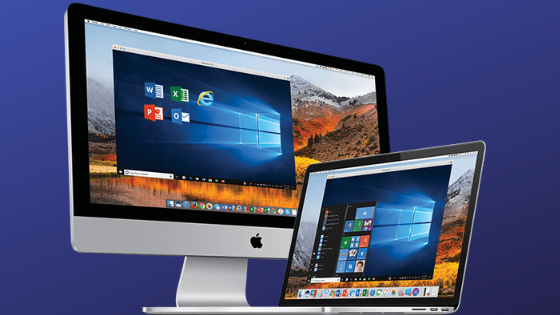
Although you have decided to switch to macOS, you still need to use some programs available only for the Microsoft operating system and now looking for a solution to use them without buying a new PC. Within this new tutorial today we will explain specifically how to virtualize Windows on Mac using two powerful and well-known software.
Preliminary operation
Before specifically looking at how to virtualize Windows, you first need to get the ISO file of the preferred version of Microsoft’s operating system. So, you can download Windows 10, 8.1 or 7 by following some practical steps using the dedicated pages on the official website of the Redmond giant. In this case, we suggest you consider our guide how to install Windows on Mac where you will find instructions to be followed to download the ISO image of the preferred release.
Still on the Microsoft website, however, it is possible to download ready-to- use Virtual Machines that can be used with VirtualBox or Parallels Desktop. All you have to do is open the default browser on your computer and connect to the Download
virtual machines page. At this point, press on the Select one drop-down menu (present under Virtual Machine ) and c
hoose one of the availabl
e options based on the chosen operating system (eg MSEdge on Win10 x64 Stable 1809 to download the Windows 10 virtual machine ).
After that, use the Select one drop-down menu (present under Select platform ) and press on the software you intend to use to virtualize Windows on Mac (eg VirtualBox ). Complete the operation by clicking on the Downoload .Zip button that appears below.
It should be noted that the virtual machines proposed by Microsoft can be used within a maximum of 90 days from creation, after which they will need to be restored. In addition to this, it is necessary to enter a password in order to extract the content from the zip file which is usually Passw0rd!. You can still find it in the 4 lines under the heading Before installing, please note.
How to virtualize Windows on Mac with VirtualBox
The first software that we advise you to use to use Windows simultaneously with macOS on your Mac in a completely free way is called VirtualBox. This is a well-known open source virtualization software also available for Windows and Linux which, despite being free, provides numerous features that we find on paid software. Since we have already talked in depth about VirtualBox some time ago, we advise you to read the guide how to install Windows on Mac through virtualization.
If you would like to import a virtual machine already created into VirtualBox or the one downloaded from the Microsoft website, you just need to follow some simple steps.
Here are what they are:
- First, extract the file from the previously downloaded zip using a special software and then start VirtualBox.
- Through the main screen, click on the File menu at the top left, choose Import virtual application and then select the Virtual Machine file to import by clicking on the yellow folder icon.
- After that, follow the instructions provided by the software to complete the virtual machine import.
- Once this procedure is completed, in the main VirtualBox window you will find the Virtual Machine of the chosen operating system.
If you have a Virtual Machine available in VDI format (virtual hard disk), you need to press the New button to proceed with the creation of the new virtual machine. After this, follow the instructions provided in the guide listed in the last lines.
During installation, you will have to choose the Use the existing virtual hard disk file option, click on the yellow folder icon and select the VDI file of the virtual machine. Complete by pressing on Create.
How to virtualize Windows on Mac with Parallels Desktop
If you are looking for a more complete solution or VirtualBox has not satisfied you, then we recommend using Parallels Desktop to virtualize Windows on Mac. We are facing one of the most complete and advanced virtualization programs on the market. Unlike VirtualBox, however, it is not a free software since it provides a starting cost of 79.99 dollars for the standard version up to 99.99 dollars per year for the Pro Edition and Business Edition versions. Fortunately, however, a free trial is available that allows you to use the software for free for 14 days.
Compared to VirtualBox, Parallels Desktop offers better performance and is also easier to use. In addition to this, you can access your personal Mac folders from Windows or copy and paste files and folders or activate the Coherence view to integrate Windows and Windows menus into MacOS. You can learn more about Parallels Desktop on the program page.
Let’s find out the steps to follow to use the program:
- Open Safari or the browser you use to surf the Internet, connect to the official Parallels Desktop website by clicking on the link above, press the Download free trial button and then click on Download now to proceed with the download of the version of program test.
- Once the installation is complete, press the appropriate button to use the trial version (which we remind you is 14 days) and then press on the + or choose New from the File menu at the top to create a new Virtual Machine on which to install Windows.
- At this point, click on the item Get Windows 10 from Microsoft to allow Parallels Desktop to automatically download the ISO file from the Internet or choose Install Windows or another OS from a DVD or image file if you have the ISO image available. Alternatively, the option Transfer Windows from a PC is also available, which allows you to transfer a true Windows installation to a Virtual Machine.
- Choosing the Install Windows to another OS option from a DVD or image file, select the Windows 10, 8.1 or 7 ISO file, click on Next and then enter the product key if you want to activate the Microsoft operating system immediately.
- Once pressed on the Next button, choose the type of use you want to make of the virtual machine and enter the name to be assigned to it. If desired, it is also possible to customize various parameters of the Virtual Machine using the Customize settings before installation option.
- From here, a window will open with various options that allow you to choose the amount of RAM to be assigned to the virtual machine, the size of the hard disk and so on.
- Once the complete configuration of the VM is complete, click on Next to proceed with the actual installation of Windows.
- When finished, you can start the virtual machine by simply clicking on the icon that appears in
the main Parallels Desktop window. Be careful to wait for the installation of the various drivers that will allow you to run the virtual machine correctly.
If you need to import a Virtual Machine already in your possession (like the one downloaded from the Microsoft website), then click on the File menu at the top, choose Open and select the virtual machine to load in the software.
How to virtualize Windows on Mac: alternatives
If you are not satisfied with VirtualBox or Parallels Desktop, then it is possible to virtualize Windows on Mac using alternative solutions that we propose below.
- Vagrant
- VMware Fusion 11
- Boot Camp (install Windows in dual boot with macOS)
- PlayOnMac (allows to install single programs for Windows on macOS)