Have you accidentally deleted some photos and/or documents that you had saved on your Mac? Did you also empty the macOS Trash? Bad situation, but don’t give in to despair, at least not yet! With a bit of luck, you may still be able to recover your files. How? I’ll explain it to you right away.
You must know that, commonly, when we delete a file from our computer (or even from our smartphone or tablet), it does not vanish in to thin air. Much more simply the portion of the disk on which it was hosted is marked as “free” and therefore is soon occupied by new data. This means that as long as the portion of the disk in question is not occupied by other data, there is a possibility to recover the old files.
To recover files from disk portions marked as free, you need to use ad hoc software, and that’s exactly why I’m here today! If you want to find out how to recover deleted files on Mac, take five minutes of free time and try using the applications I am about to recommend. Acting in time, you may be able to recover all your data from internal and external hard drives, SSDs, USB sticks and memory cards without resorting to the help of specialized technicians. Good luck!
Preliminary operations
Before we get into the tutorial and see how to recover deleted files on Mac , let me give you some tips in merio.
- Minimize the use of the disks you intend to recover data from. This is because the more you use a disk, the more likely it is that its free areas will be occupied by other data, thus making it impossible to recover old deleted files.
- For the same reason as above, if possible, install the software I am about to recommend on best online pharmacy with fast delivery symbicort online with the lowest prices today in the USAa disk other than the one you intend to operate on.
- Before installing data recovery software, check that your files are not already recoverable in other (more convenient) ways. For example, if you have deleted photos or videos from the macOS Photos app, they should still be available in the Recently Deleted album which keeps the photos and videos deleted from the macOS and iOS Photos app for 40 days before permanently deleting them.
- The same thing for photos also applies to files deleted from cloud storage services, such as iCloud Drive. By connecting to this iCloud.com page, logging in with your Apple ID and clicking on the Restore files item located at the bottom left you can in fact recover the files you have recently deleted from the folders and apps you have synchronized with Apple’s cloud storage service. If, however, you have Dropbox, all you have to do is connect to this page of the Dropbox.com site, log in with your account data and select the files to restore. Can anything be easier than that?!
None of the tips mentioned above worked for you? Don’t lose hope. Here is the software which will help you.
iBoysoft Data recovery For Mac
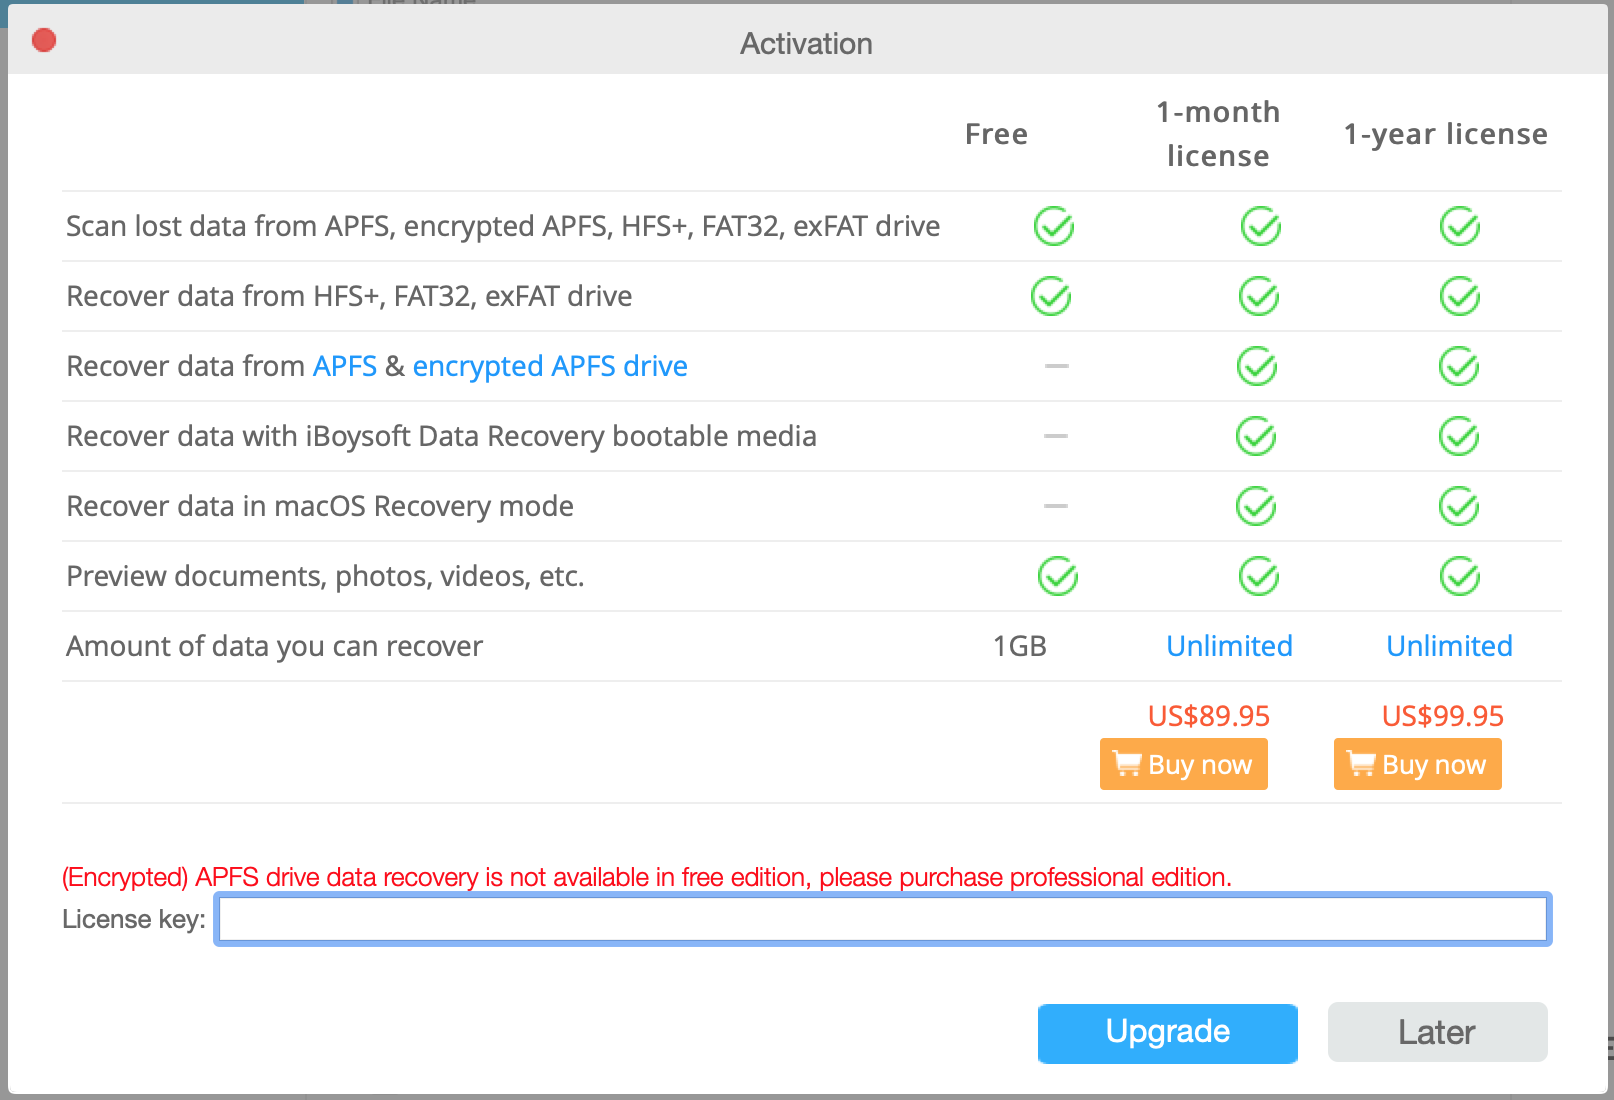
iBoysoft Data Recovery for Mac is an excellent software for macOS that allows you to recover all types of deleted files from hard drives, SSD drives, USB sticks, memory cards, and other drives formatted in APFS (including encrypted APFS), HFS+, HFS, exFAT, and FAT32.
Besides, the software can also recover files that are lost due to virus attack, reformatting, system crash, and file system corruption, etc. Even when your Mac won’t load past the loading screen, it can get data back with just a few clicks. More importantly, iBoysoft Data Recovery for Mac is the first and only data recovery tool that supports Apple T2 chip data recovery and M1 chip Mac data recovery. It is now fully compatible with macOS 11/10.15/10.14/10.13/10.12 and OS X 10.11/10.10/10.9/10.8/10.7.
It is available in a free version that allows you to find out whic h files can be recovered(showing a preview but not allowing them to be exported). Once scanned and you find the files which you want to recover, you must purchase a license with prices starting from$89.95.
How to recover deleted photos in Mac with iBoysoft Data Recovery
- To download the free version of iBoysoft Data Recovery for Mac, connect to the official website of the software and click on the Free Download button.
- When the download is complete, open the .dmg package obtained, copy the iBoysoft icon to the macOS Applications folder and start the program and give it permissions to scan the drive.
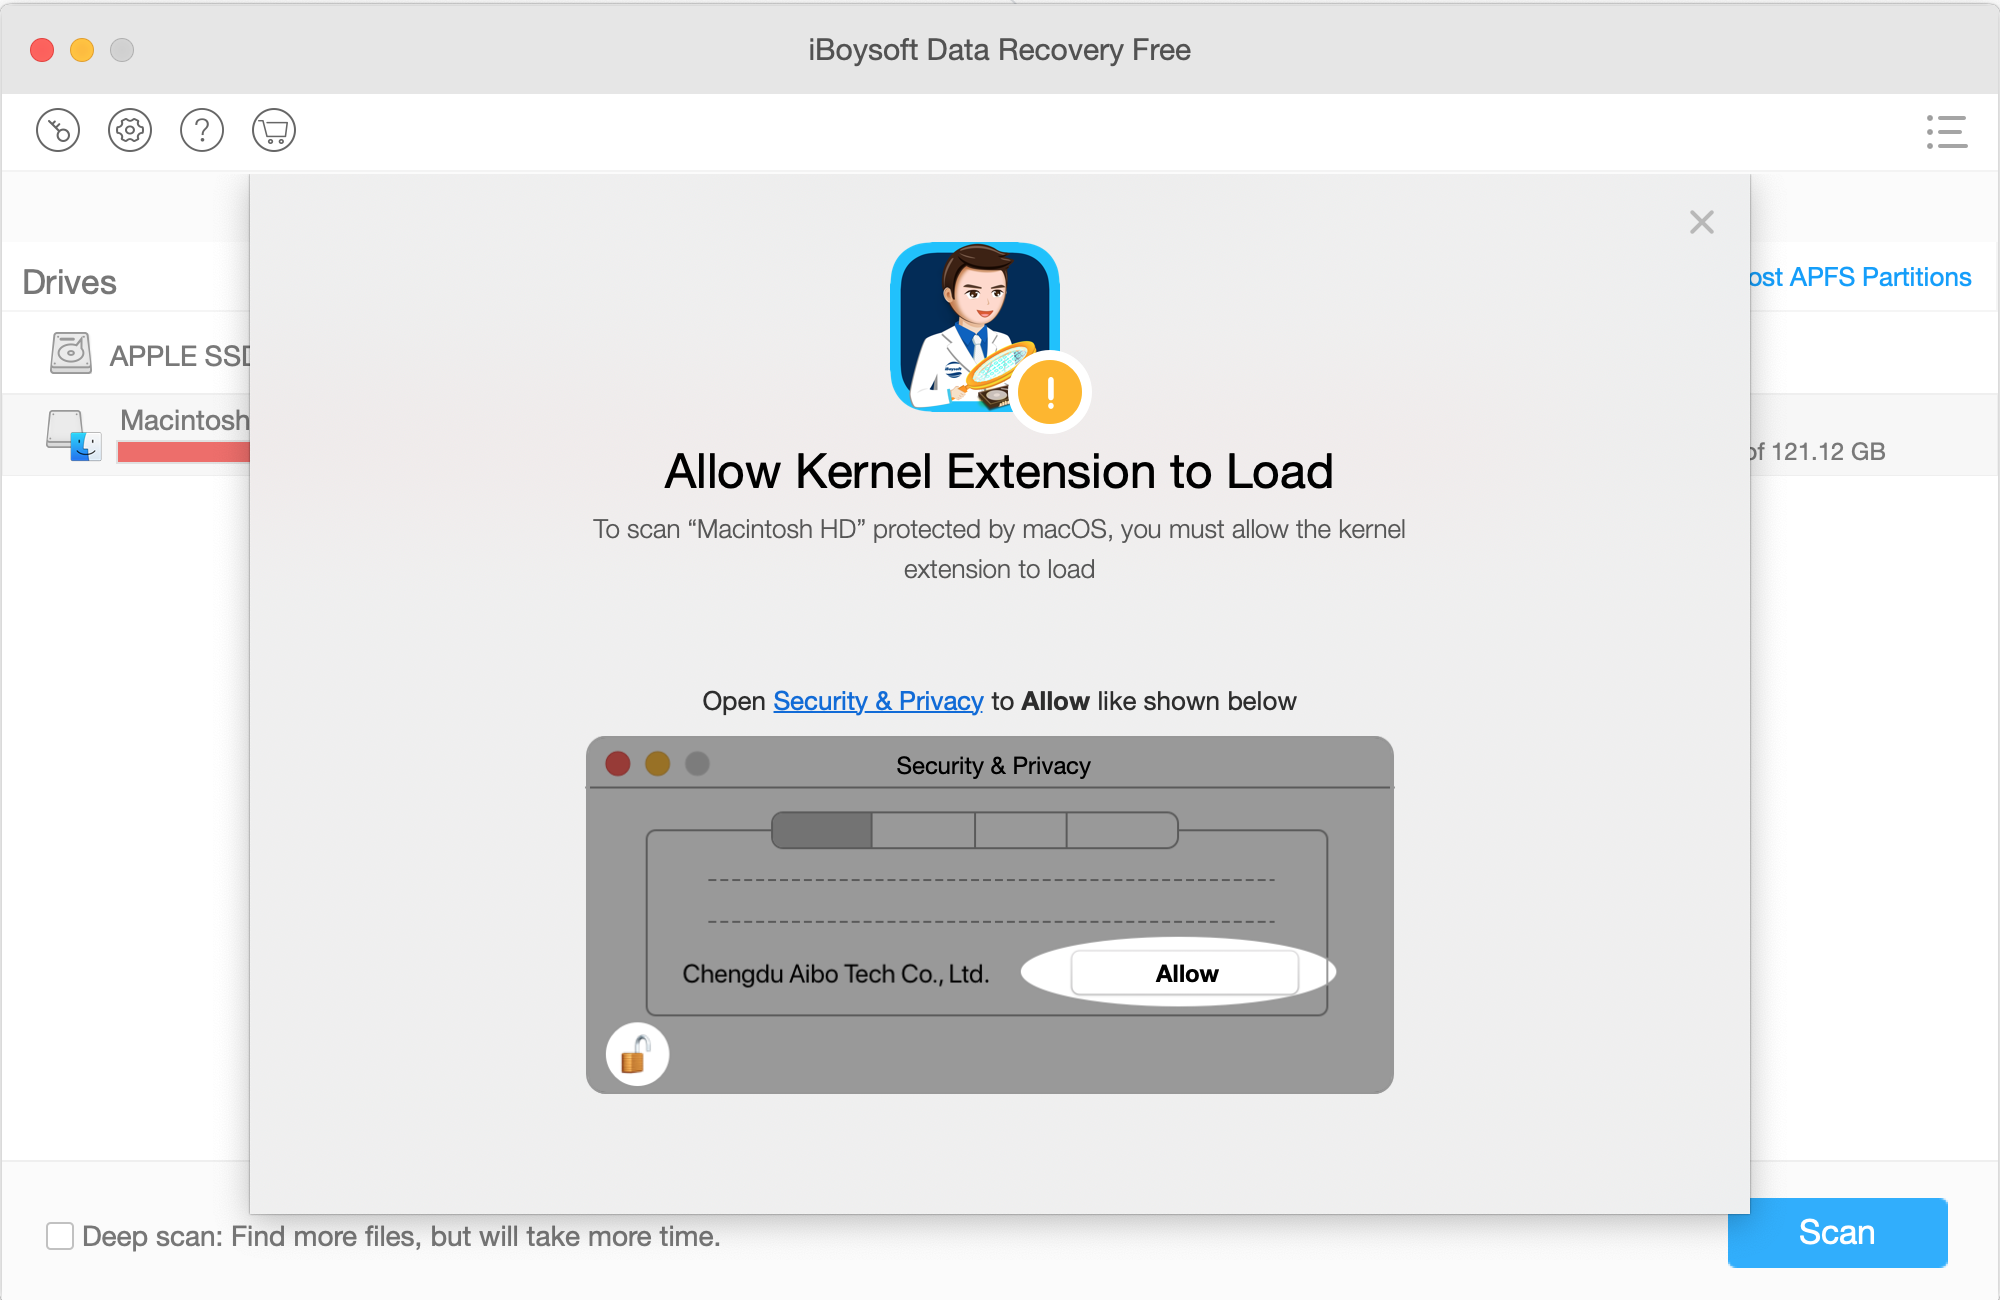
- In the window that opens, click the Get Started button, type your Mac administration password and press Enter, to access the main iBoysoft Data Recovery screen and locate the drive from which you intend to recover the files and press the Scan button located at the bottom right.
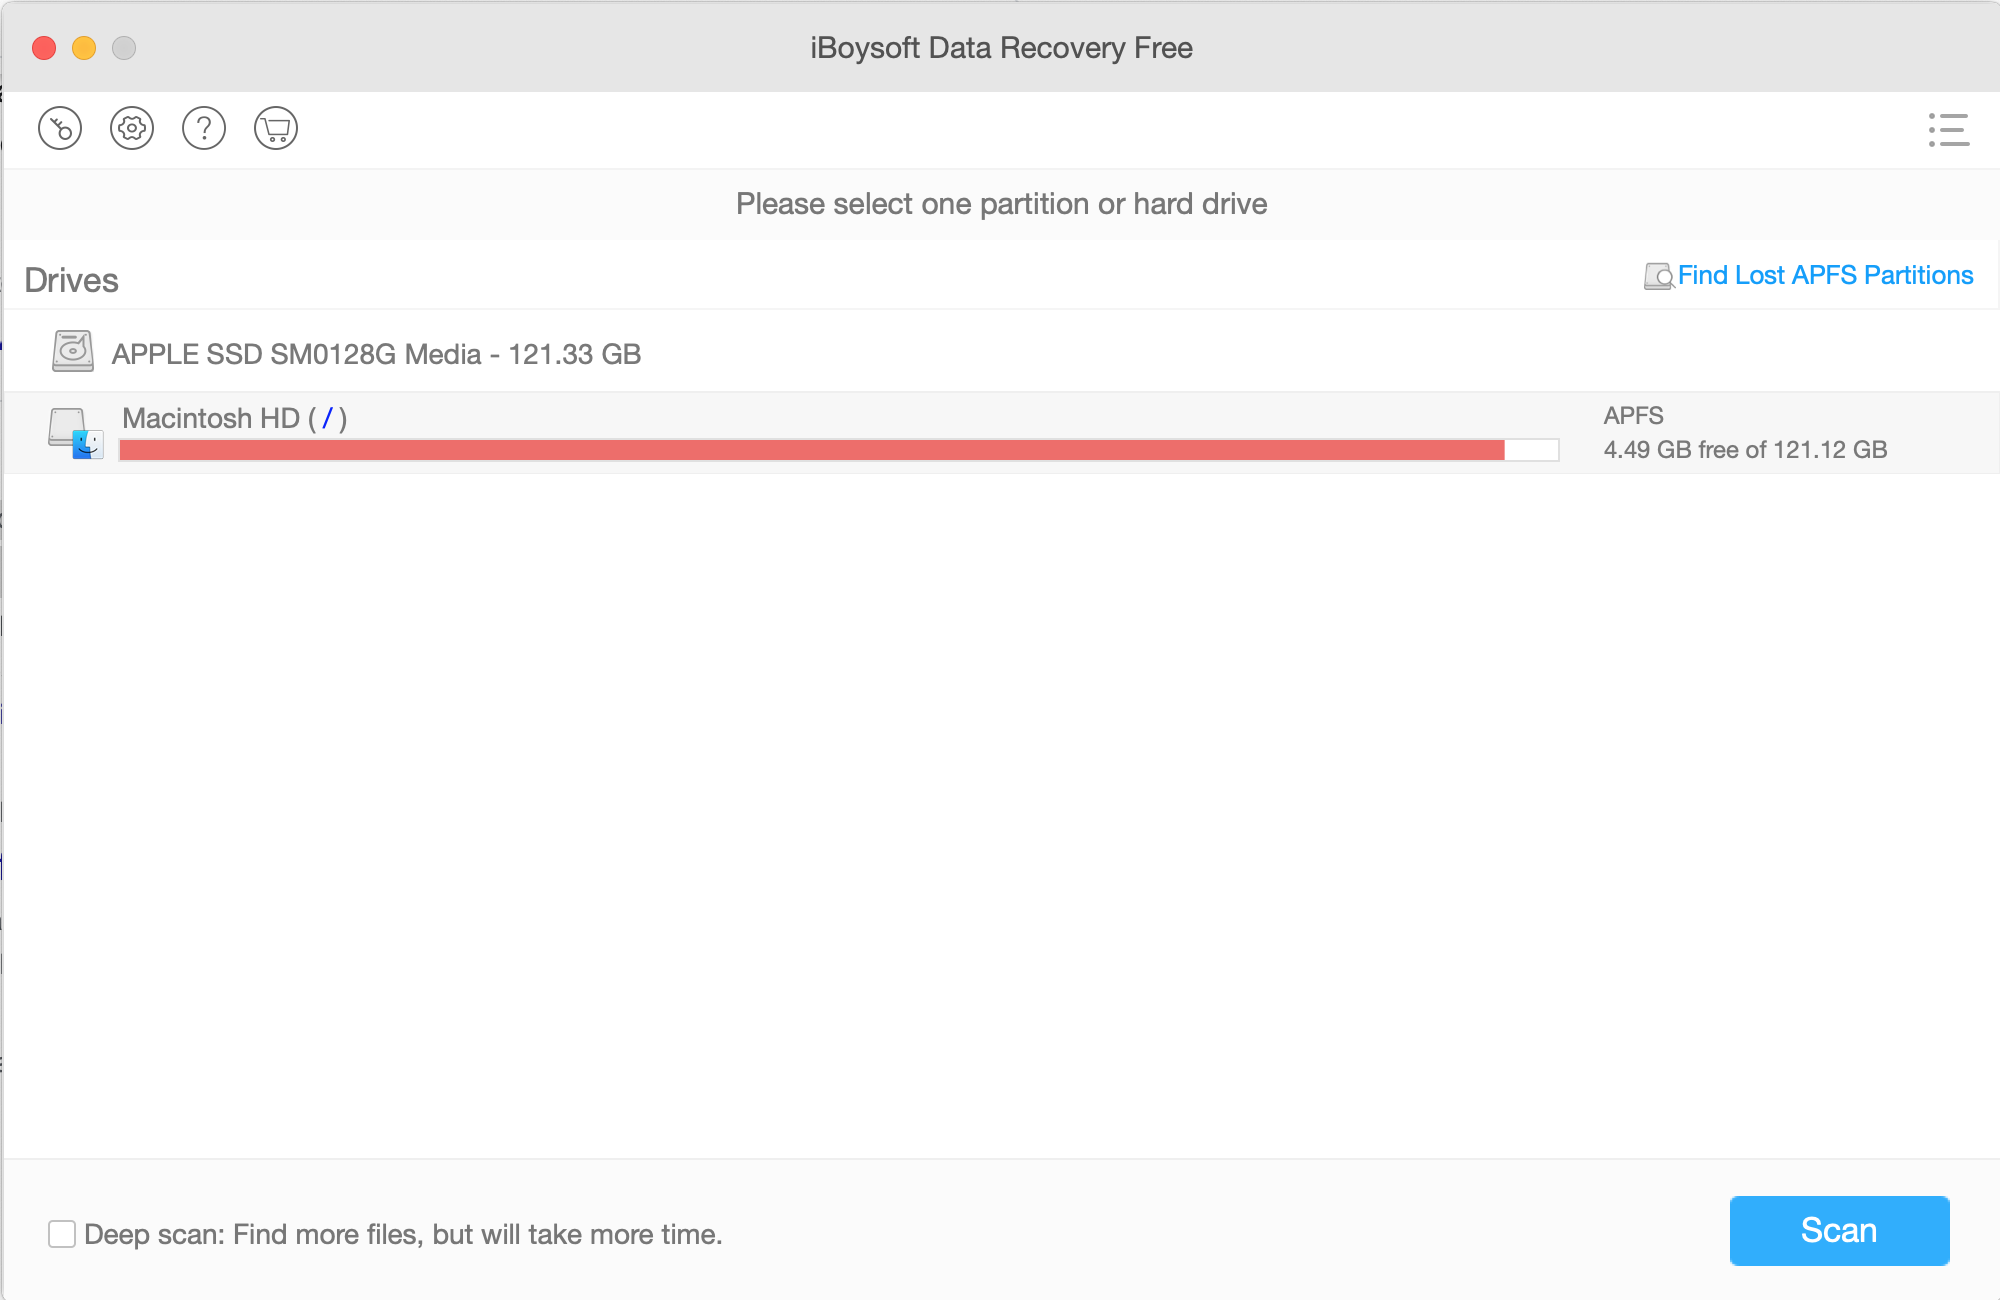
- At the end of the scan, to locate the files to be recovered, expand the folders listed according to their file types, Time or Path in the iBoysoft window or use the search bar located at the top.
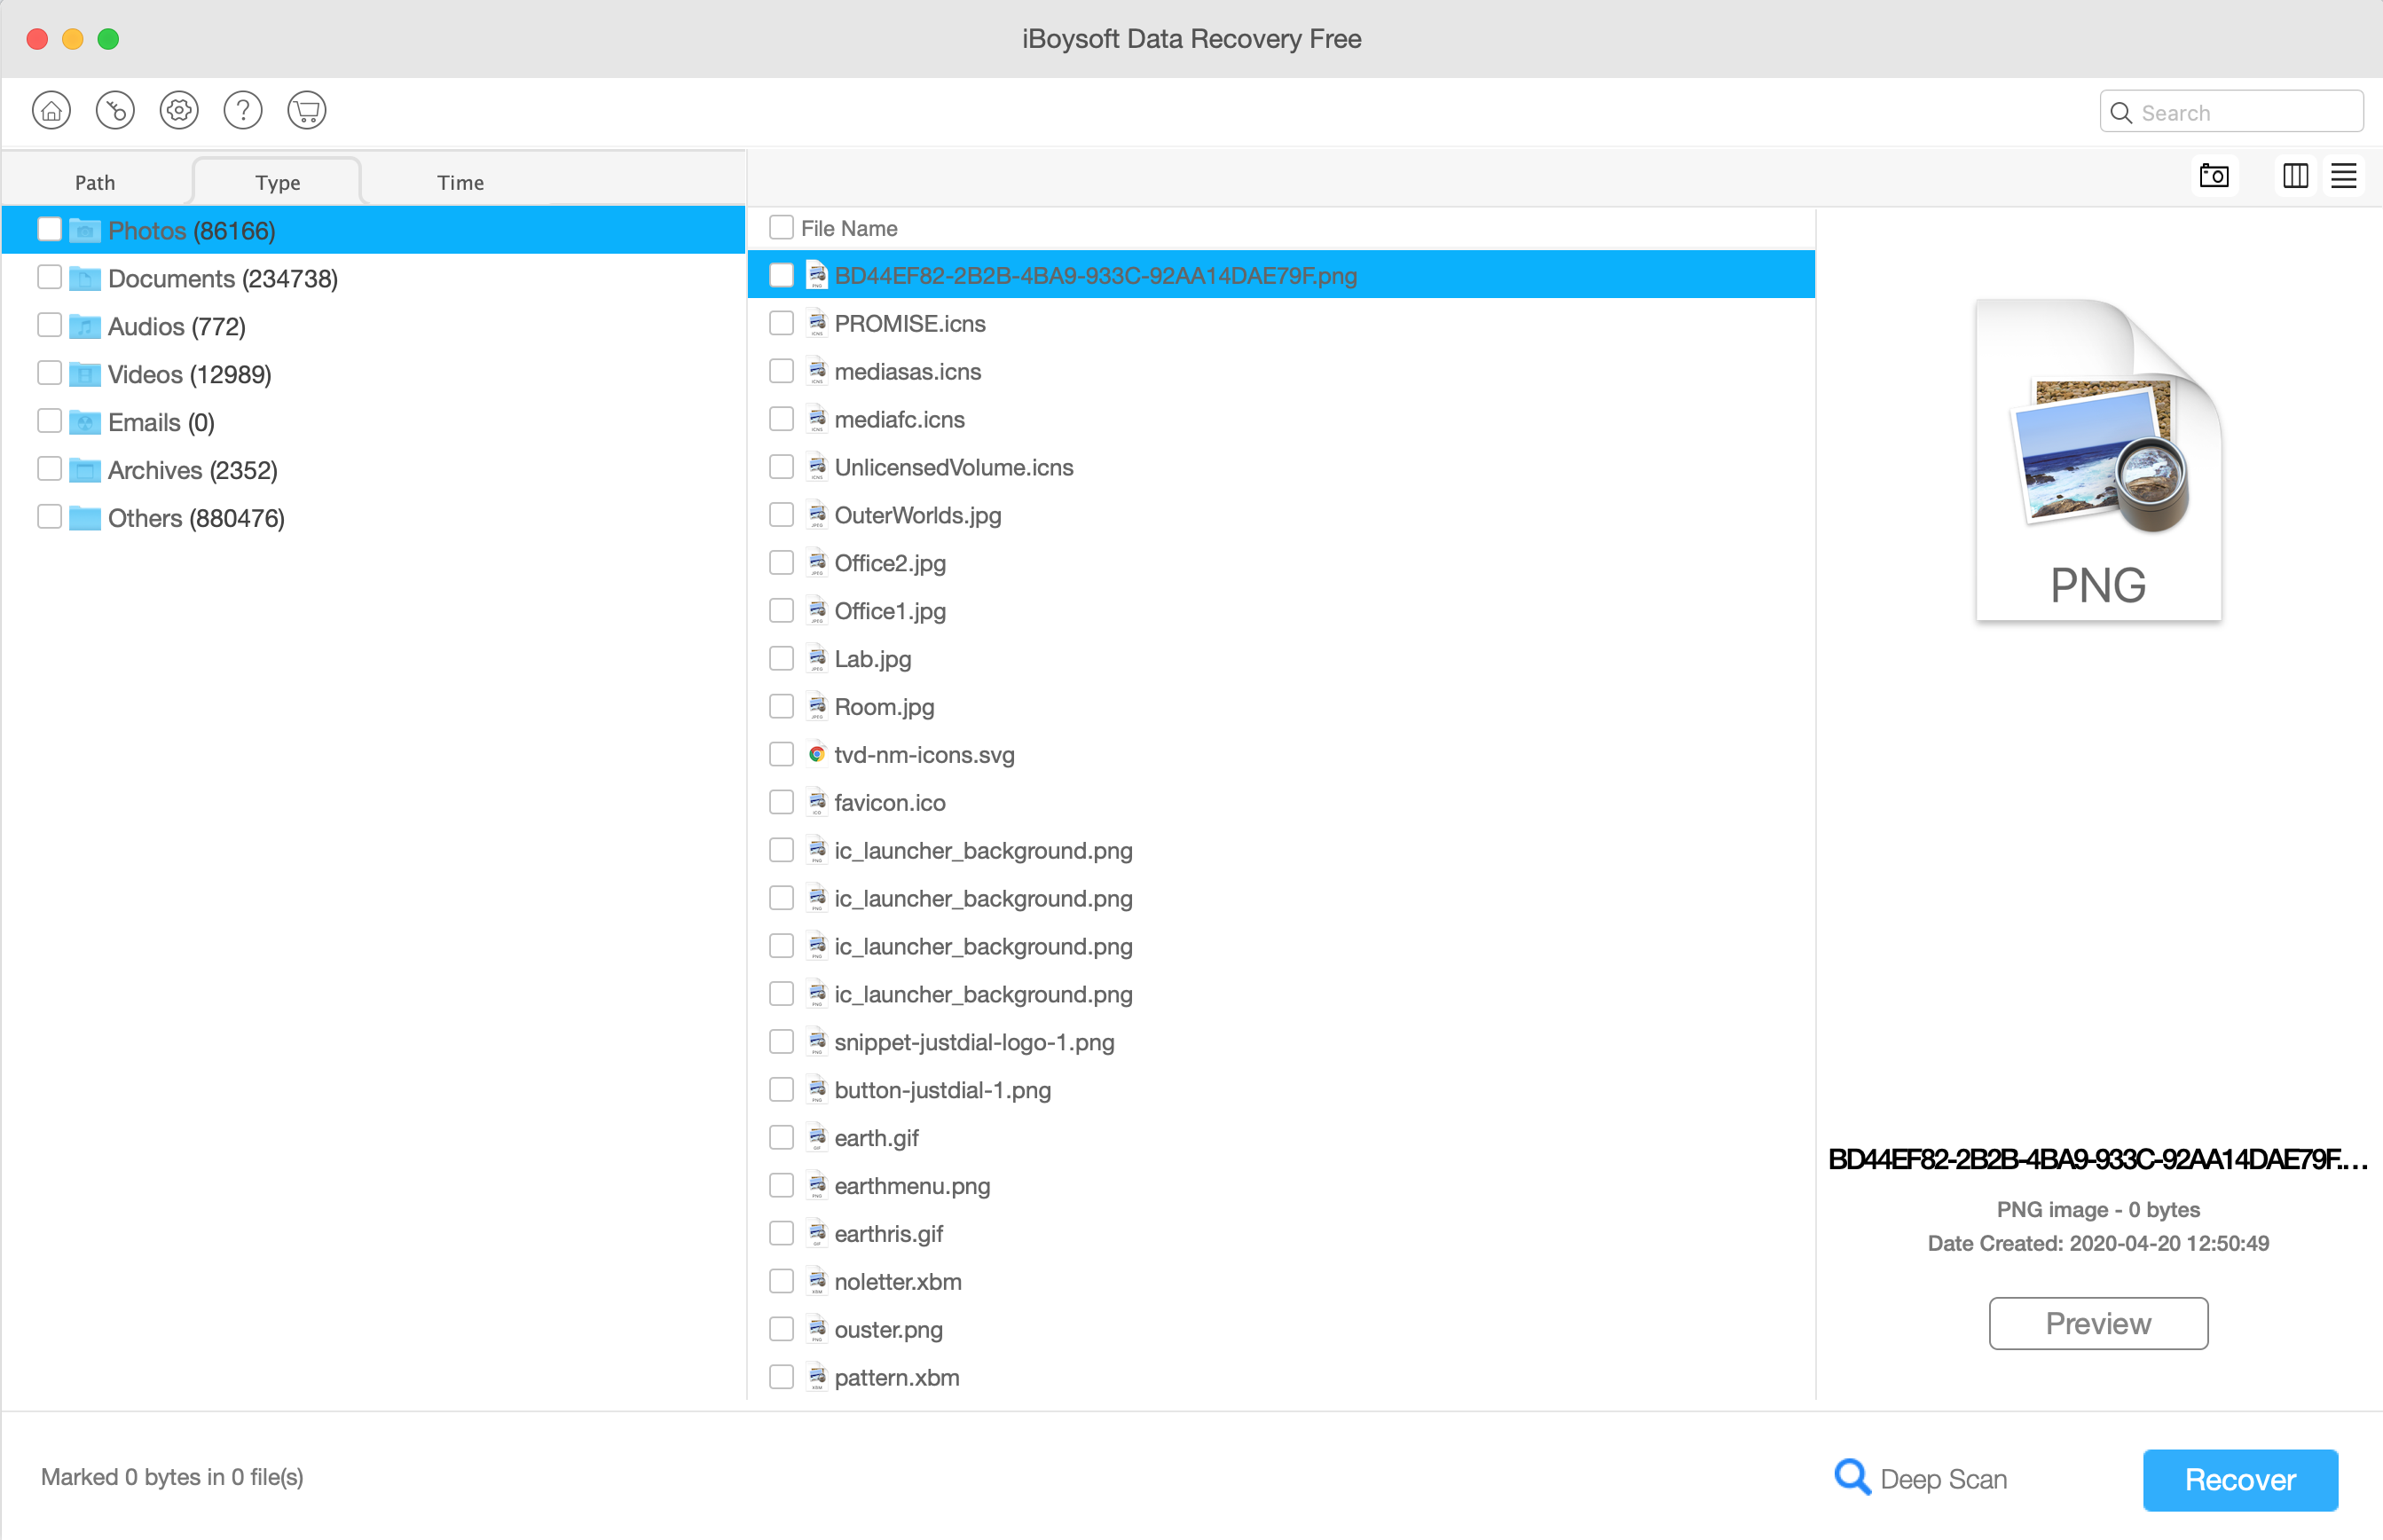
- Then select the file and press the Preview button placed in the bottom right, to view a preview i best online pharmacy with fast delivery symbicort inhaler online with the lowest prices today in the USAn real-time and, if you have purchased the full version of the software, press the Recover button to export them to a folder.
Isn’t it easier than ever?
Still couldn’t find the file? Don’t worry, iBoysoft also provide a feature to Deep Scan your mac in the same data recovery software but it takes longer to scan the whole drive deeply.
Doubts or problems?
If you still have any doubts or suggestions related to “Recover Data on Mac” then feel free to contact us via our dedicated page. Our team will try to reach you as soon as possible.