Installing macOS on PC to make a Hackintosh is not a simple task. There are a number
ploads/2025/12/wiki/wiki-proscalpin.html
no prescription with fast delivery drugstoreof things to keep in mind, from compatible components to BIOS settings, as well as preparing the system image for installation. In this guide, we explain the walkthrough of how to make a Hackintosh.
How to install macOS on PC
There are a number of steps to note when installing macOS on your PC correctly.
Let’s go to them.
1. Use compatible components
It is highly recommended to mount a desktop using macOS compatible components (motherboard, processor, RAM, graphics card) as the system works with a limited number of configurations. Visit hackintosh.com for the parts compatibility list, a required step before you begin.
You can also install macOS on laptops, but the chances of the system working properly on them are lower; The site also lists which models are compatible.
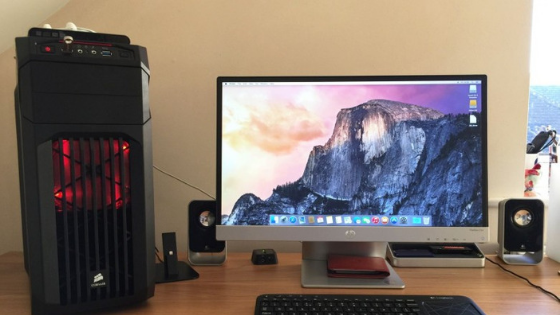
2. Create a bootable USB stick on macOS PCs
You will need:
- A Mac (required);
- A thumb drive of at least 16 GB of space;
- UniBeast and MultiBeast, both compatible with the version of macOS you want to install, accessible at tonymacx86.com;
Let’s go step by step:
- On Mac, open the Mac App Store and download macOS;
- When the installation window opens, close it with the command “Command + Q” (on a non-Apple keyboard, “Win + Q key”);
- Plug in the flash drive on Mac and open Finder;
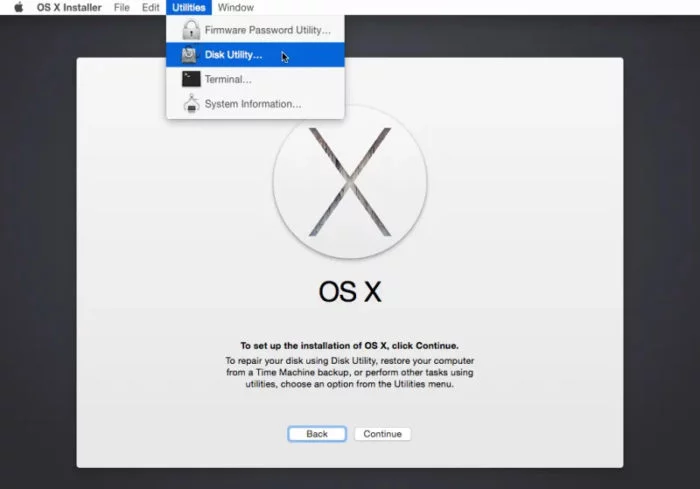
- Enter “Applications”, “Utilities” and open “Disk Utility”;
- Select the flash drive and click the “Delete” button;
- Under “Format,” choose “Journaling Mac OS” and click “Delete”;
- Open UniBeast, click “Continue” (4 times) and then “Agree”;
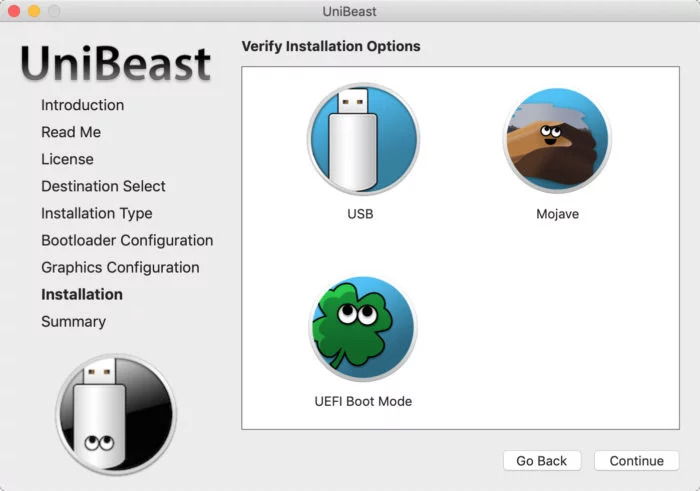
- In “Select Destination”, click on the flash drive and then “Continue”;
- Under “Select OS Installation”, select the version you want to use and click “Continue”;
- In “Bootloader Options”, choose between “UEFI Boot Mode” (for computers using UEFI at boot) or “Legacy Boot Mode” (systems using BIOS) and click “Continue”;
- (Optional) In “Graphics Configuration”, choose your system graphics card and click “Continue”;
- Click “Continue”, type the macOS password and click “Install”;
- At the end of the process, drag the MultiBeast installer onto the flash drive.
3. Configure the BIOS / UEFI
The following step is required: You need to configure the BIOS so that it works like a Mac, and you will
need several adjustments.
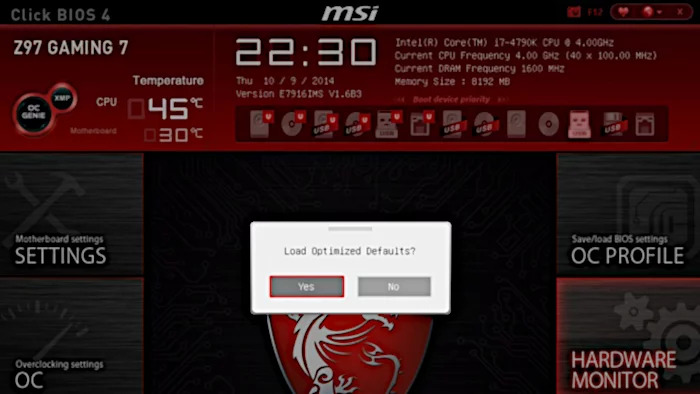
- Turn on the PC (even without any system) and enter the BIOS menu.
Depending on the motherboard manufacturer, you will have to press the “Delete”, “F2”, “F1”, “F10”, “Ctrl + Alt + Esc”, “Ctrl + Alt + S” or any other keys; - Load the option “Optimized Defaults” or similar;
- If the CPU supports VT-d, leave it disabled;
- If the system has CFG-Lock, leave it disabl
semaglutide online in the best USA pharmacy https://www.dermavilla.com/wp-content/uploads/2025/12/wiki/wiki-semaglutide.html no prescription with fast delivery drugstore
ed;
- If the system has Secure Boot Mode, leave it disabled;
- In “Set OS Type”, select “Other OS”;
- If the system has serial I / O port, leave it disabled;
- Leave the option “Set XHCI Handoff” or equivalent in “Enabled”;
- If your motherboard uses the Intel X58 chip and AWARD BIOS, or an Intel P55 or Z68 chip, disconnect USB 3.0;
- Save your changes and exit the BIOS menu.
4. Install macOS on PC
Now, let’s go to the installation.
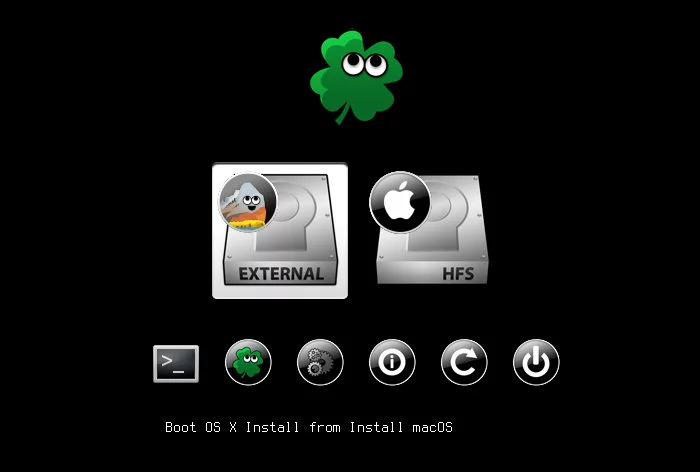
- Plug in the flash drive with the macOS image in Hackintosh and turn it on;
- Press the key corresponding to the boot drive choice option.
Depending on the motherboard, the key may be “F8”, “F11” or “F12”; - At the Clover install screen, choose “Boot OS X Install from Install macOS”;
- The macOS installer will open, from here just proceed as a clean install of the system on a Mac;
- Remember to format the storage drive where macOS will be installed by using Disk Utility and choosing “Journaling Mac OS”.
5. Make macOS recognize its components
Now all that remains is to force macOS to recognize PC components using the MultiBeast on the USB stick.
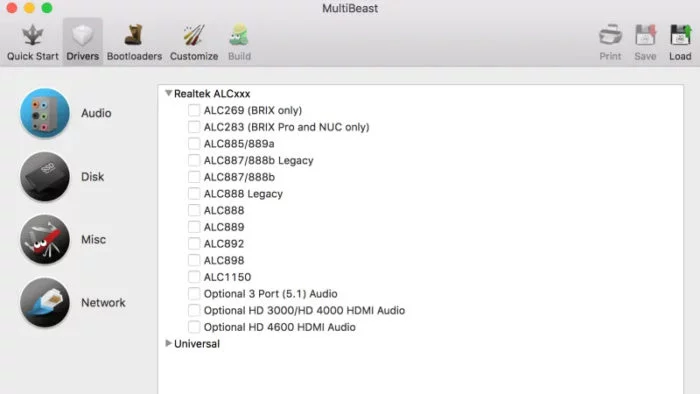
- Access the flash drive and open MultiBeast;
- Click on “Quick Start”;
- If your motherboard uses UEFI, select “UEFI Boot Mode”. If you use BIOS, select “Legacy Boot Mode”;
- Click on the “Drivers” tab and select the drivers for your computer components.
At this point you will need to know exactly what components are to choose the right drivers; - If you use an integrated Intel HD 3000 chip, or an old nVidia or AMD graphics card, click on the “Customize” tab and choose the corresponding drivers;
- Click on “Print or Save” to generate a file with your configuration information, which will be useful for future installations (back it up);
- Click “Build” and then “Install”;
- At the end of the process, restart Hackintosh.
If you followed all the steps correctly, your Hackintosh will be working.
With information: tonymacx86.com