In Windows 10 you can set the network type to “Private” or “Publi
c”. We’ll show you how to change the network type if you did not set it up properly, and what the difference is between network types in Windows 10 and Windows 7.
What is the network type? Difference between “private” and “public”
Windows 10 differentiates between the network types “Private” and “Public“. These are the differences:
| Public network | Private network | |
| PC in the network visible to others | No | Yes |
| Sharing files and printers | No | Yes |
| Suitable for |
|
|
In Windows 7 one could choose between the three network types “home network”, “workstation network” and “public network”.
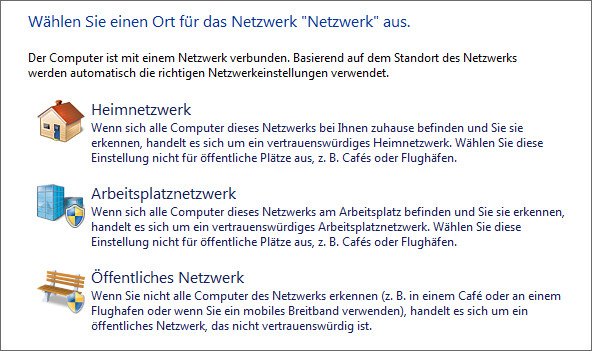
This corresponds to the following network types in Windows 10:
| Windows 7 network type | Corresponding Windows 10 network type |
| Home Network | Private |
| Work network | Private |
| Public network | Public |
If you have set in the wrong network type, you can change it later in Windows 10.
Change network type in Windows 10 (method 1)
- Press the key combination Windows + R to open the settings.
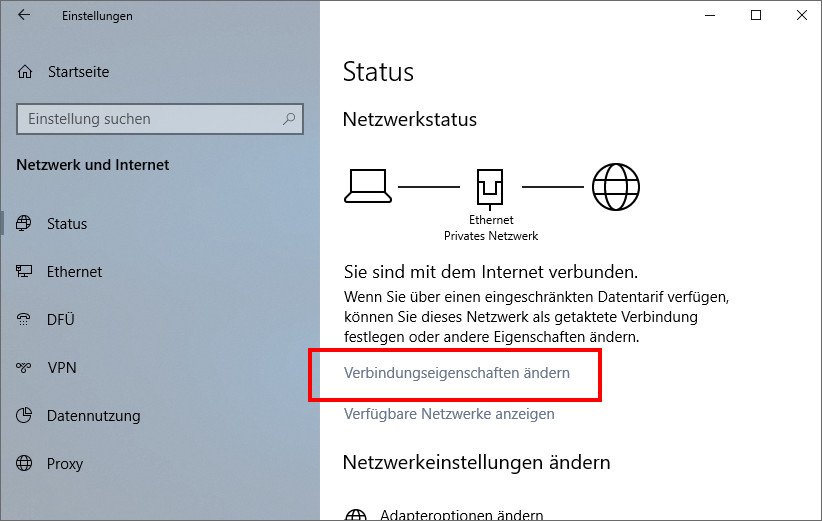
- Click on Network and Internet> Status .
- Click on ” Change connection properties ” on the right side of the window .
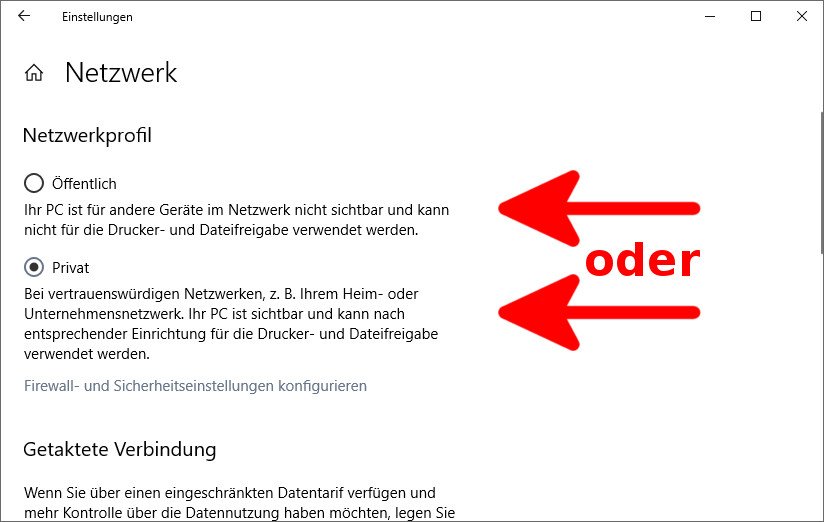
- Activate the “Public” or “Private” option – depending on which network type you would like to use.


The top programs for Windows 10 look like this:

Windows 10: Change Network Type in Registry (Method 2)
If the first method did not work, you change the network type in the Registy of Windows 10:
- Press the key combination Windows + R to open the Run dialog.
- Type in regedit and press Enter .
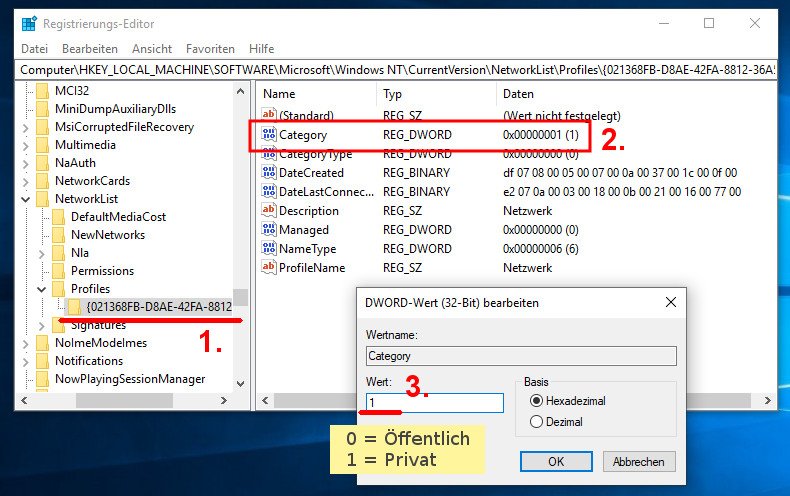
- Navigate to the key:
Computer\HKEY_LOCAL_MACHINE\SOFTWARE\Microsoft\Windows NT\CurrentVersion\NetworkList\Profiles - On the left side in the navigation you can see under the key “Profiles” one or more subfolders that stand for all created network profiles in Windows 10. Click on them one after the other and look at the “ProfileName” value on the right side of the window to select the correct profile.
- Double click on the value “Category” in the right subfolder on the right.
- Sets the value 0 (zero) for a public network. Enter a 1 if you want it to be a private network.
- Confirm with ” OK ” and close the registry again.

If you have had problems or something has not worked, please feel free to write in the comment section below this article so we can help you.