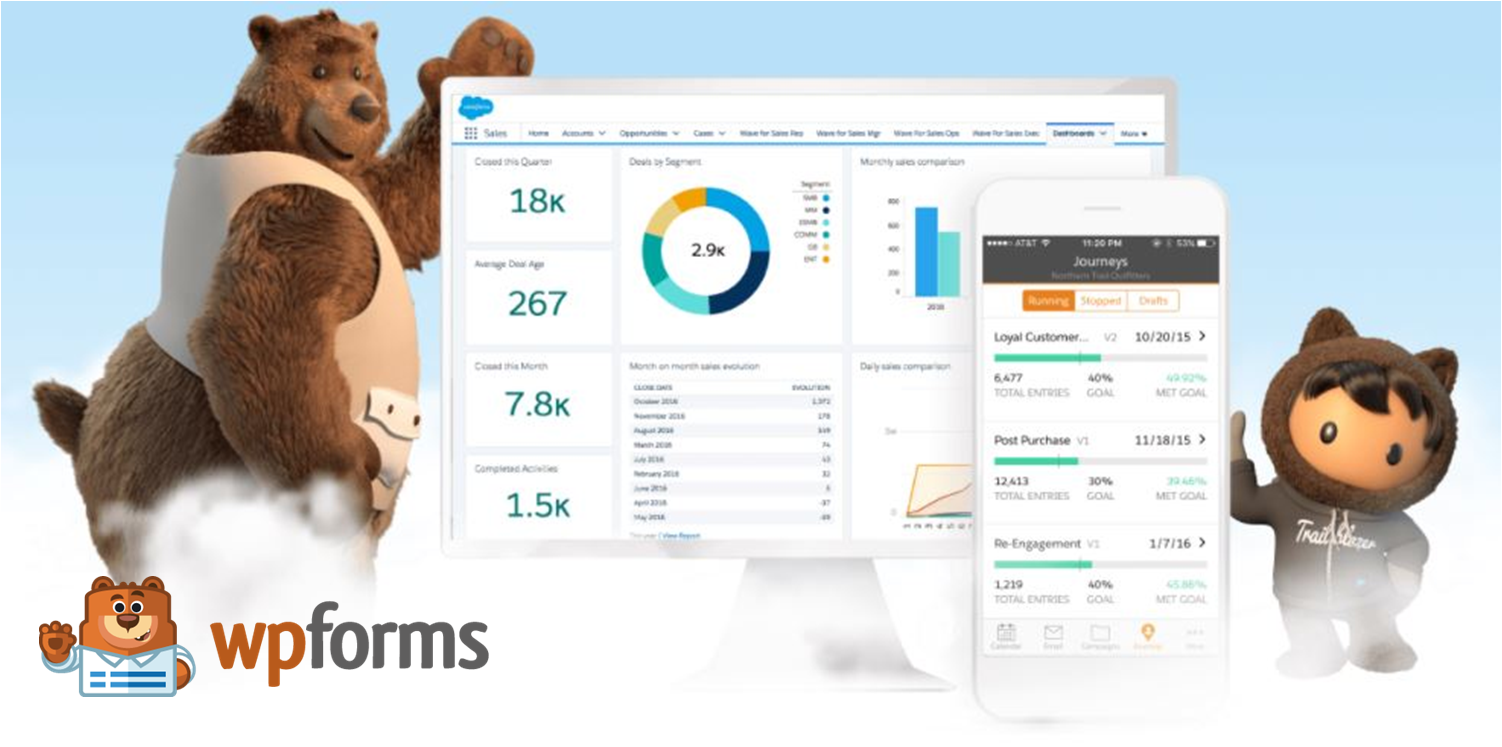
Today we have good news for you! As you can suspect from the heading, WPForms’ new Salesforce addon can ease your work by automatically sending customer form entries to Salesforce CRM.
It’s the time to say goodbye to the traditional method(Copy/pasting Form Entries to CR
What is Salesforce?
Salesforce is a cloud-based CRM (Customer Relationship Management) solution that facilitates the smooth functioning of the business by focusing on customer needs. With the help of the utility, It is possible to store all customer data, make calls, send emails, create reports, schedule appointments, manage pipelines, etc… in one place.
Since Salesforce is a cloud-based technology no further expense is required to set it up, also all your team members can manage the business activities anytime anywhere!.
What is WPForms?
WPForms is a great WordPress plugin that allows you to create professional good looking forms (eg: Contact form). Its scope is not only limited to creating forms and accepting form entries but also you can do more like integrating apps, accepting payments, etc…
WPForms is enriched with awesome features like Drag and Drop form builder, Responsive Mobile Friendly Design, Instant Notifications, Easy to Embed, Spam Protection.
I think now we are all set to go through the Salesforce to WPForms integration Steps.
How to Integrate Salesforce CRM to WPForms?
First of all, make sure that the WPForms Plugin is installed in your WordPress. Before going to integration steps please note that you must have a WPForms Elite license to use this feature. If you don’t have the license request you to get the license before moving further.
Step 1 – Check the Salesforce Edition
Please ensure that your Salesforce account has API access. You can check the salesforce version in order to understand whether you have API access or not. API access will be available in all these plans: Enterprise Edition, Developer Edition, Unlimited Edition, Performance Edition.
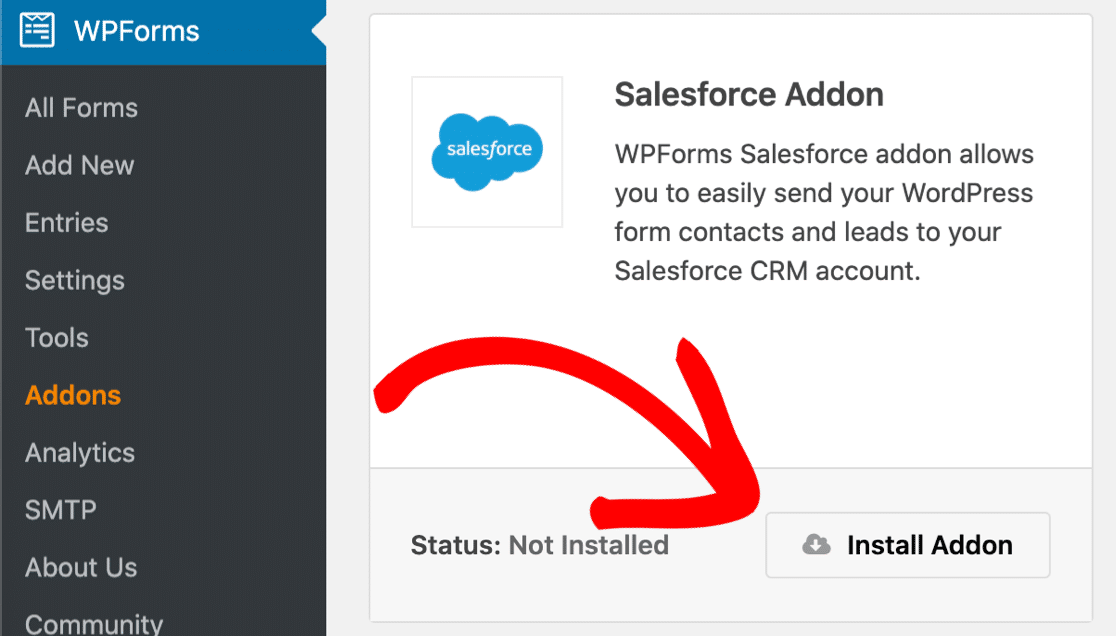
Step 2 – Install Salesforce addon to WPForms
Once you install and activate the WPForms Plugin you can Install the Salesforce addon.
Step 3 – Setup Integration
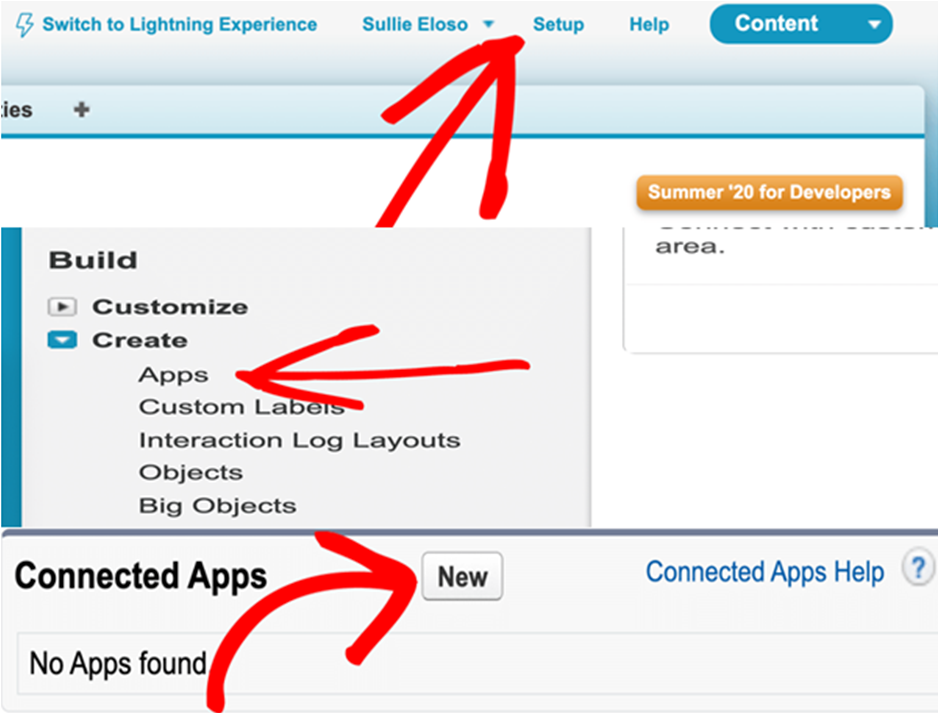
Sign in to your Salesforce account and click on the ‘Switch to salesforce classic’ link by clicking your profile Icon. Now it’s time to create a connected App, Navigate to Setup > Create > Apps > New as shown in the below picture.
Please provide all the required basic information for creating the App.
Step 4 – Setup App Permissions
Click on the Enable OAuth Setting check box, there you will be able to see space to give a call back URL. To get the callback URL switch back to your WordPress site and navigate to WPForms > Settings > Integrations > Add New Account. There you will get the Callback URL just copy the URL and paste it in the Salesforce OAuth settings box.
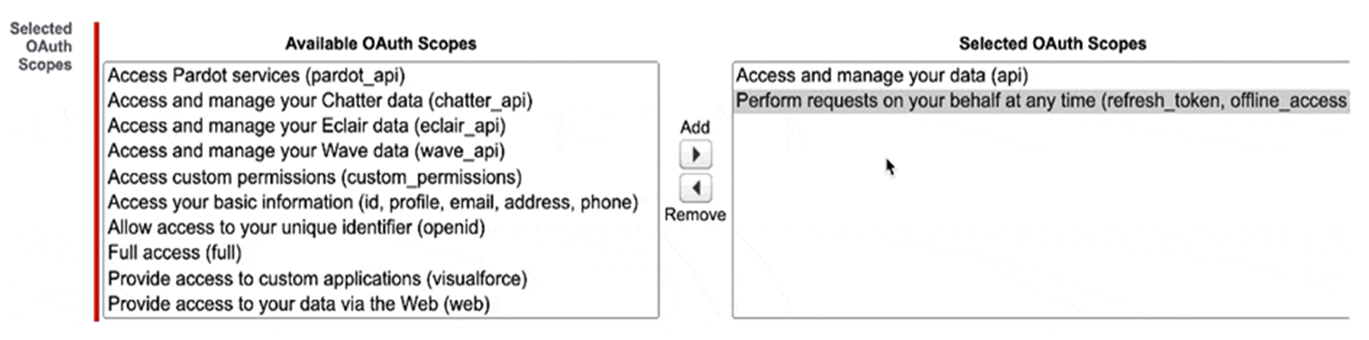
Now scroll down to Selected OAuth Scopes Please add these two OAuth scopes as given in the below picture ”Access and manage your data (api)”, ”Perform requests on your behalf at any time (refresh_token, offline_access)”
Well done! we are good to go please click on the below save button. If you get an error like this: ”error=invalid_client_id&error_description=client%20identifier%20invalid” then wait for 10 minutes and retry.
Step 5 – Connect WordPress to Salesforce
Copy the Consumer Key and Secret Key from your Salesforce account and paste it in WPForms. Click on the Connect to Salesforce button and allow access. Done! now you can see that we have a success messa
How to Create Salesforce WordPress Form
We have completed the integration successfully, now it’s the time to see how to create the forms and test that we are able to see the entries in Salesforce.
- Navigate to Marketing > Salesforce > Add New Connection
- Enter a connection name and click OK
- Kindly Select the Salesforce account that you have created earlier and Select Lead from the Salesforce object dropdown.
- Map the fields on the contact form to the fields in the leads area of our Salesforce account.
- Click on the save button and publish the form. Done!
- It’s possible to test the form now and to make sure everything is working fine. When you submit the form entry, you’ll see the corresponding entry in Salesforce
Time is precious right? we should be always conscious to use it precisely. We are sure that WPForms Salesforce integration will definitely help you a lot in saving time & effort, Give it a try!