For some years now we no longer hear that iOS is too limited and not very customizable and this is because Apple, with its continuous updates, has never stopped adding features and improving the user experience. This allowed third-party developers to be able to work on projects that were previously absolutely impossible and impractical to install on mobile devices and tablets from the Cupertino company.
Among these, of course, there are those related to the development of keyboards, which can in fact be installed on iPhones and iPads without any difficulty. Among the most known and useful we find that of Google and SwiftKey, avail
able for free on the App Store. In this guide we will go then to see how to use a third-party keyboard on Ap
ple devices, going to deactivate the standard one.
Goodbye keyboard stock, how to change it on iPhone and iPad
Our advice is to eventually download only well-reviewed keyboards and maybe developed by well-known companies worldwide. This is because, if you present bugs, any application that needs a keyboard may be unusable, at least until the keyboard itself is removed.
The keyboard will obviously have to be downloaded from the App Store before being installed and to do so we invite you to search for your favorite from the search panel of the same digital store. In this article we will use “RainbowKey – Keyboard Themes”.
- Open the downloaded keyboard app for a first configuration (preferences change based on the chosen app)
- Allow any requests to access the device (unnecessary notifications)
- Exit and open the Settings application
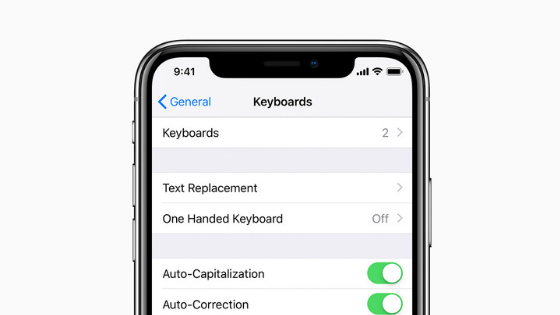
- Go down to “General” and then “Keyboard”
- Click on “Keyboards” and then “Add new keyboard …”
- From the “THIRD-PARTY KEYBOARDS” panel select the unloaded one (in this case RainbowKey)
- Click on “Edit” at the top right and drag the chosen keyboard into the first potion while holding down the icon to its right
- Delete (optional action) by clicking on the red circle on the left
From this moment on, when the presence of a keyboard is required, t
he one downloaded and “set” will appear automatically following the options listed above. Obviously, to bring ever
opion online in the best USA pharmacy https://nursingabroad.net/wp-content/uploads/2025/12/wiki/wiki-bupropion.html no prescription with fast delivery drugstore
ything back to normal, it will be enough
to retrace the same path and eliminating the one previously selected.