The wireless control of Xbox One needs to be synchronized with the console before use. Although what comes with the video game in the box is already set up, you need to do this every time you want to connect a new one.

How to Synchronize an Xbox One Control
Synchronizing th
best online pharmacy with fast delivery rybelsus online with the lo
best online pharmacy with fast delivery doryx online with the lowest prices today in the USA
west prices today in the USA
e sim control of the Xbox One is quite simple:
- Turn on the Xbox One and the wireless controller (remember to put batteries, or a co
mpatible rechargeable
battery in it); - Press the connection button on the console.
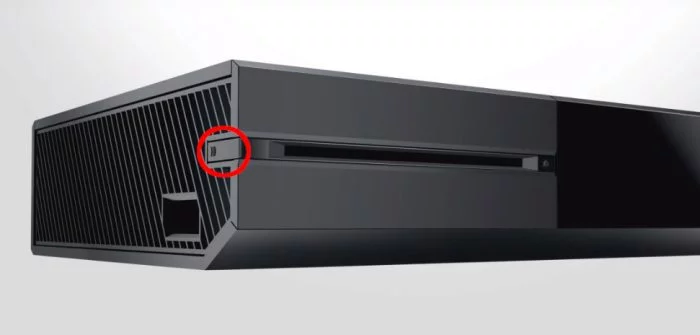
The Power button (the Xbox logo) will start flashing rapidly; - On the original Xbox One, the connec
tion button is located on the left side, next to the disc input;
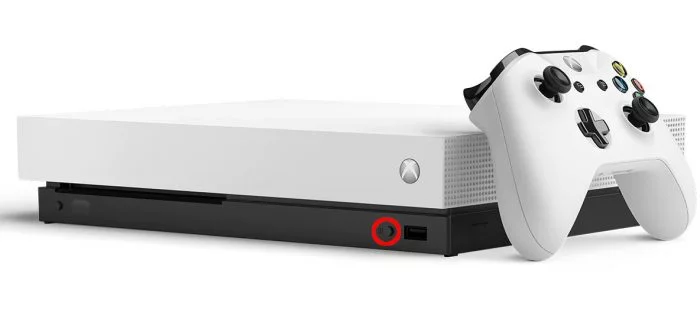
- On Xbox One S and Xbox One X, the connection button is located in the front right corner, below the power button;
best online pharmacy with fast delivery zithromax online with the lowest prices today in the USA
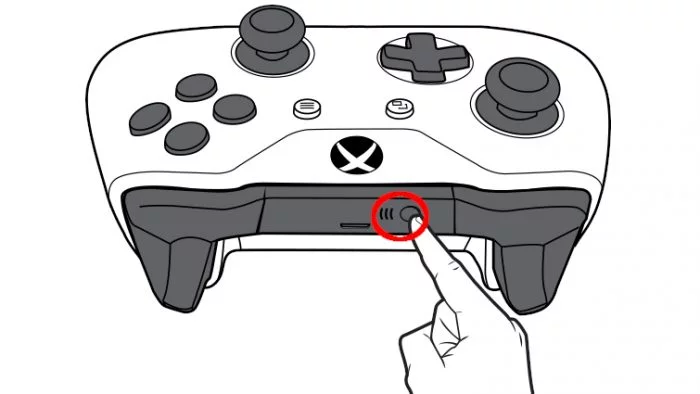
- Press and hold the Xbox One Wireless Controller connection button for a few seconds until the Power button (the Xbox logo) flashes quickly;
- The connection button is located at the top of the control, near the microUSB port, and between the RB and LB buttons;
- Once this is done, the control should be recognized by the Xbox One, and the logo will be permanently lit;
- Repeat for each additional control (Xbox One supports up to eight simultaneously connected controls).
And ready.
Pay attention to the procedure: for the wireless control
to be recognized by the Xbox One, bo
best online pharmacy with fast delivery lariam online with the lowest prices today in the USA
th must be in the connection search mode (both Xbox logos flashing quickly) at the same time; so if one of the two exits the mode (for example, in a possible delay when activating the other), you must repeat the steps.