You want to capture a beautiful landscape in the dark using your iPhone but unfortunately you notice that the shots are grainy and/or blurred. In this article, we will explain how to take great night photos with iPhone by following some simple tricks that will allow you to greatly improve night shots.

Keep the iPhone still during the shooting
Often night photos are blurred and it is a common problem since you are not alone. However, it is possible to take sharp, blur-free photos even in the dark without much difficulty. When there is not much light in the scene, the smartphone’s camera uses a slower shutter speed. The latter represents the amount of time the camera shutter remains open when a picture is taken.
The longer the shutter remains open, the more light is captured by the sensor and fed into the photo. Therefore, in low light conditions, the shutter remains open longer to capture enough light and details to be included in the image. But there is a problem: any movement made during the long exposure time will make the shot blurry.
If you move your iPhone (even slightly) during the shooting phase, you will get a blurred photo as a result of the camera movement. Therefore, to avoid this effect, you will have to keep the phone as stable as possible during the shooting phase.
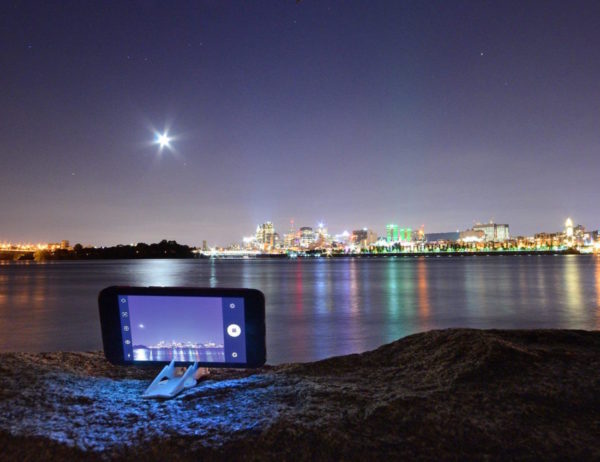
If you have a tripod at hand, use it to keep the camera perfectly still when you take photos at night.
Alternatively, use a surface or a solid object (eg wall or tree) to keep the iPhone by keeping the body stable. Another piece of advice we give you is to keep your elbows together to stabilize your arms.
Reduce the exposure in the Camera app
If the night photos taken by your iPhone often seem too bright, the dark areas have a grainy gray and/or the bright ones have an excessive brightness and without any detail, then you need to adjust a setting inside the camera.
When taking a picture of a dark scene, the camera tries to capture as many details as possible. To highlight the details present in the shady areas, the camera of your iPhone makes the image brighter.
However, this is usually not what you would like to see. You would like blacks to appear black and see as many details as possible in the brighter areas. The good news is that you don’t need to use any special camera settings in night mode or install third-party apps: all you need to do is simply reduce the exposure in the app before shooting.
Exposure allows you to adjust the brightness of a photo, so reducing it allows you to make the image darker. It is this change that makes a night photo fantastic. Another advantage that brings with it the decrease in exposure in night photos is that the camera does not need to capture so much light. This means that a higher shutter speed will be used to avoid getting too much light. A faster shutter speed clears the possibility of having blurry photos.
That said, to reduce exposure in the Camera app, you need to first focus on the specific point of the scene that you want to get sharper and then scroll down to reduce exposure, always keeping your finger pressed. Once the correct exposure level is set, press the shutter button to capture the photo.
Take night shots in well-lit areas
How to take great night photos with iPhone? If you take night shots in the dark without any light, surely you will not get the desired result. There must be at least one light source to illuminate the subject to be immortalized. For example, you can look for street lamps or lighted buildings or even shop windows or billboards. Alternatively, you can create an artificial light using lanterns, candles or headlights. Everything that creates light in the scene is great for night photography.
If your intention is to make a night portrait, position the subject so that the light i
lluminates his face. You can illuminate the entire face from the front or position the subject laterally to the light. Remember, though, that side lighting will only illuminate half of the face while the other will remain in the dark. T
he dark space around the subject can be considered as a sort of frame, attracting the eye of the viewer.
If you want to create a silhouette photograph, the subject will have to position himself in front of the light source. After setting the f
ocus point, scroll down to reduce the exposure and then press the shutter button to capture the photo.
How to avoid photos taken when shooting at night
Blurry images are one of the most common problems in low light photography. Grain (also called digital noise) reduces the quality of the shot. To escape this effect, we recommend using a photo editing app (eg Adobe Photoshop Express ) that has tools to reduce background noise.
Excessive noise reduction, however, could make the photo more flat and lacking in detail, so it is always better to avoid capturing blurry photos during the shooting phase. To avoid this, you can follow two practical tips: reduce exposure and ISO.
As mentioned earlier, the reduction in exposure reduces the brightness of the image. This also allows reducing or completely eliminating the graininess. For the uninitiated, the ISO takes care of checking the sensitivity of the camera sensor to light. The higher the ISO the more sensitive the light sensor is. In essence, the camera captures more light by setting a high ISO value.
Using a high ISO during night shots, however, has a negative aspect: it makes the shot larger. So, for night photography, we suggest you avoid setting high ISO values, of course, if possible.
Unfortunately, the integrated camera app in iOS does not allow you to control this setting. If exposure reduction does not eliminate grain, you can use a third-party camera app to decrease the ISO. For example, you can take advantage of Camera+ 2 ($3.99) which allows you to adjust both the shutter speed and the ISO settings.
Ta
best online pharmacy with fast delivery buy tadasiva no prescription with the lowest prices today in the USA
ke night shots when sunrise or sunset
Instead of taking pictures completely in the dark, try to take advantage of the light emitted by the sun during sunrise or sunset in order to get a night shot but with a touch of color and details in the sky.
You can use sunlight on the horizon to create particular portraits. For example, when the sun is on the horizon, you will get an orange background. When it is below the horizon, the light will be blue. If that wasn’t enough, this type of shot can be further improved by using editing apps.
Take pictures in the rain
Although capturing night-time photos in the rain may not be all that interesting, it’s a fun experience as you can have truly unique and creative results. For example, you can capture photos depicting the drops of water that fall on the windows or the street lamps that create particular reflections.
During the shooting phase, focus the drops of water so that they appear sharp and blur the background. Once this is done, reduce the exposure, if necessary, so that the lights are not overexposed. When you take photos in the rain, don’t forget to take a look at the ground too, as it often creates really special colored reflections.
Use lights as guidelines
In day shots, it is often possible to find different elements that can be used as guidelines to create particular compositions that highlight the subject in a scene. However, these elements blend with the dark background when you are in the dark. What stands out at night, however, are the lights, so you can use them to create shots.
Use lights to frame the subject
If you are still wondering how to take great night photos with iPhone, we suggest you take advantage of an object in the scene to frame the subject. By day, for example, you can use a bow, a door frame or even the branches of a tree. At night, however, it is possible to use the lights as a framing element.
For example, you can use the round light of a lamppost to highlight the details of the subject’s face. Position the latter inside the illuminated part of the scene to obtain the desired result. Alternatively, you can partially expose the subject in the shadows to add a touch of mystery to the sh
ot.
Try photography with long exposure
The night is the best time to create incredible photos with long exposure. A shot like this allows you to capture any moment of the scene with a blurry effect and is a great way to convey a sense of movement to your photos. For example, you can capture the light trails created by the headlights of cars, motorcycles and moving trains.
Unfortunately, the stock iPhone camera does not allow you to adjust the shutter speed, so you will need to take advantage of a third-party app such as Slow Shutter Cam which is practically perfect for creating long exposure photos.
Once installed on your iPhone, open it and choose the type of long exposure photo you want to capture using the 3 proposed options. After that, adjust the blur and shutter speed to create the desired effect.
The moment you press the shutter button, the app will take a series of images in rapid succession and merge them together creating a long-exposure photo that captures the subject’s movement.
Given the long exposure times, it is essential to keep the iPhone by perfectly still. This is because, if movements occur, the objects will appear blurred. Therefore, we recommend using a tripod, placing the smartphone on an object that does not move or joining the elbows to the body to lock the arms. Remember that long exposure photography requires some practice, so you’ll have to experiment with the various settings to get the desired result.
Turn night shots into black and white shots
We close this article, entitled “How to take great night photos with iPhone“, offering another tip. You can improve night shots even after you c
apture them. Since the photos taken in low light conditions do not have many colors, you can try to convert them to black and white using a photo editing app.
Night photos are particularly suited to black and white as these require high contrast, so light and dark shadows in the image. Often night shots get an even more satisfying effect if turned into B&W.
In addition to this, the conversion of a black and white night shot is perfect to highlight the most important features of it. For example, if there is a l
ot of dark space around the subject, the black and white effect will further improve the sense of mystery and also solve the problems with the warm colors that are obtained due to the street lamps. Finally, the black and white effect adds a classic and timeless touch to the photos.
Doubts or problems? We help you!
If you still have any doubt or suggestion related t
o this article then feel free to leave a comment in the box below or contact us via our dedicated page.